| |
|
Click an image to enlarge. |
|
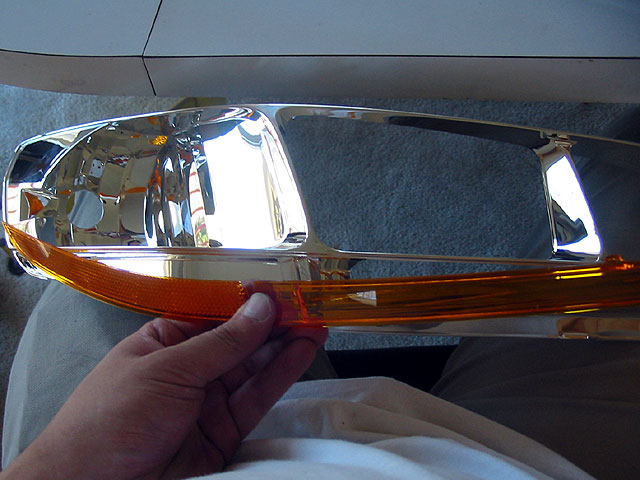
With my black car, I finally decided to clear my headlights (removing
that lower orange strip) and paint the housings black.
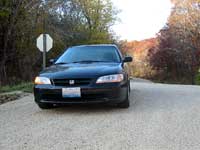
Here's what the headlights looked like previously.
|
|
 |
|
|
Another pic of what it looked like before.
|
|
 |
|
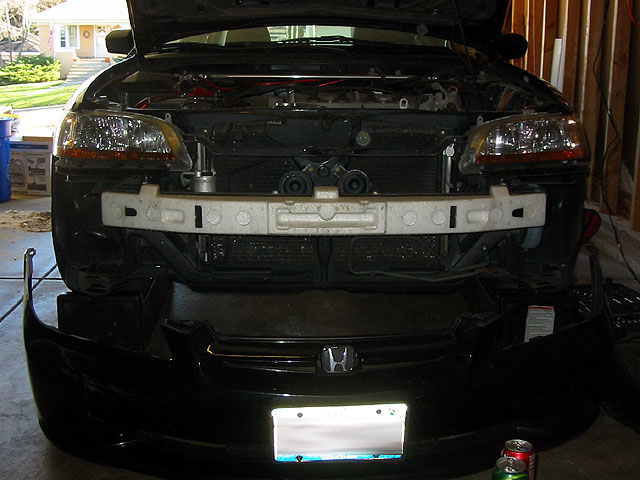
| To access the headlights, you
must remove the bumper cover, which is detailed on this page.
|
|
 |
|
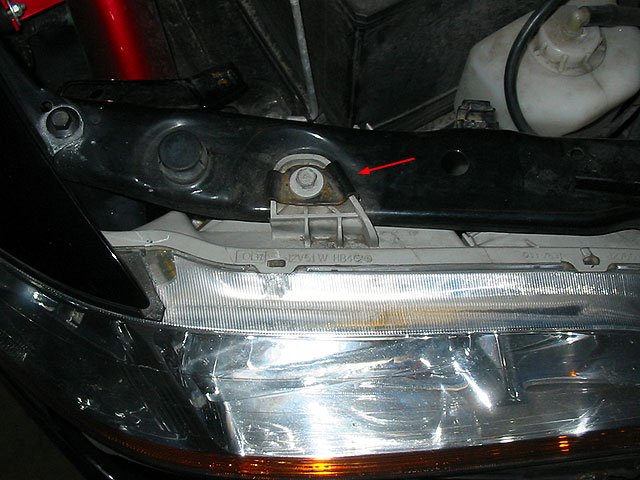
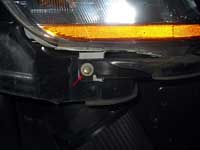
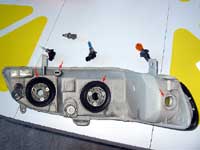
| The headlights are held on by 4 screws
each. The first is on top. |
|
 |
|
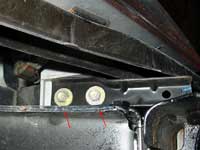
| The second screw is underneath the headlight
on the side. It also holds a metal bar which is the bumper cover support. |
|
 |
|
| The last two screws are a bit hidden.
The are underneath the headlight near the front and also hold the
bumper cover support. |
|
 |
|
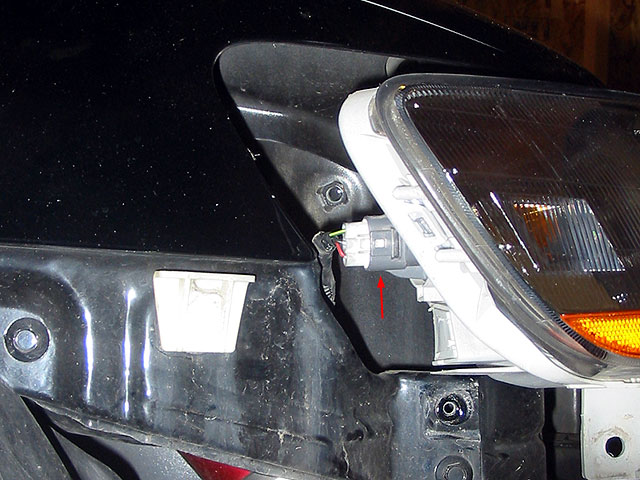
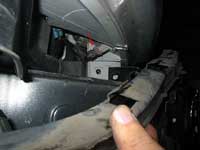
| The bumper cover support will be loose
so remove it. You should also unplug the parking light bulb harness
at the bottom of the headlights. |
|
 |
|
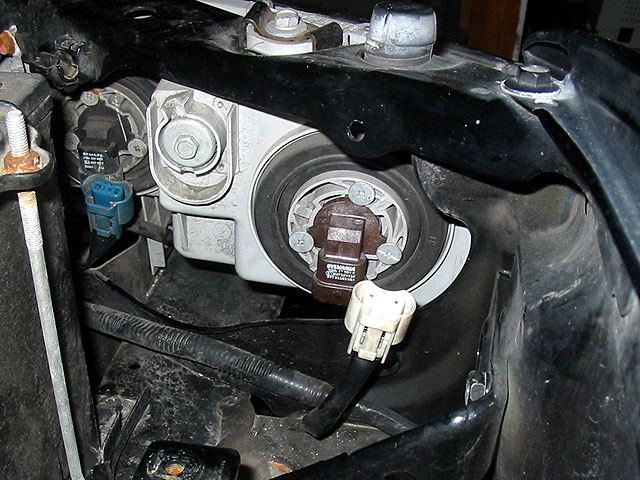
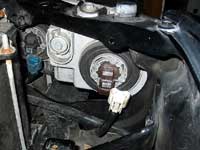
| Now unplug the main headlight and high
beam harnesses. |
|
 |
|
| Grasp the headlight and pull it out just
a little. You'll then have access to the fourth harness for the signal
lights. |
|
 |
|
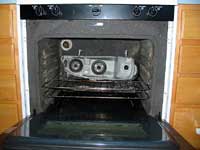
Remove the headlights completely from
the car and move inside. Pre-heat the oven to 200 degrees.
Remove all the light bulbs since you're going to be baking the headlights.
|
|
 |
|
Pop one of the headlights into the oven
for 10-15 minutes.
The tools that I recommend are two standard screw drivers and a pair
of scissors or a knife. You may want some gloves as well to handle
the hot headlights. |
|
 |
|
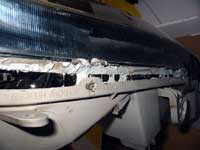
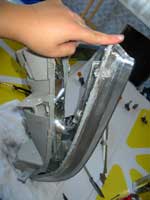
Take out the headlight from the oven.
You'll see that the two parts, the clear cover and the grey backing,
are glued together by a thick grey glue and a series of tabs. Pick
one end of the headlight and stick one of the screwdrivers in between
the two parts and start to pry them apart, releasing the tabs as necessary.
|
|
 |
|
The grey glue will be stringy as you pull
the pieces apart. As needed, cut the glue with a sharp knife or scissors
and work your way down the whole headlight assembly.
You may need to reheat the headlight a couple times before you get
it completely apart. |
|
 |
|
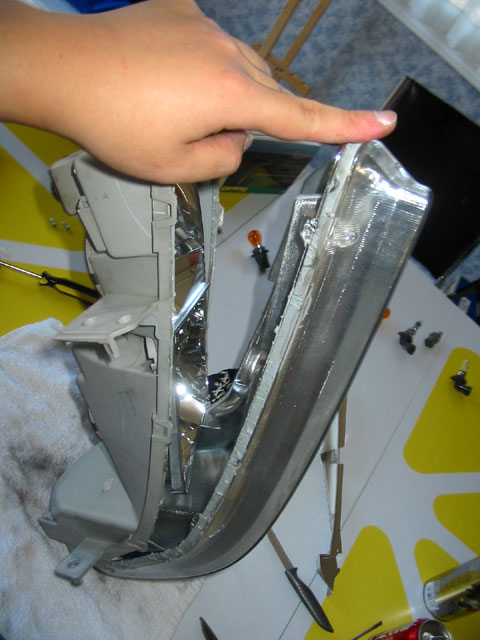
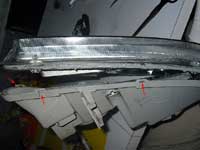
| When you're done you'll be able to completely
seperate the two parts. |
|
 |
|
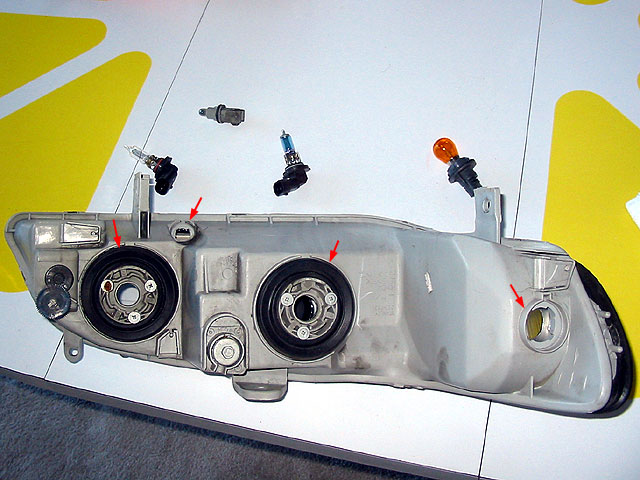
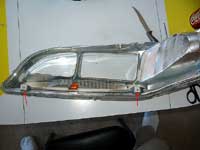
The clear half is made of 4 pieces: the
clear cover, the housing, the parking light reflector and the orange
strip that will be removed.
The pieces are held together by two small phillips screws. Remove
these and then remove the parking light reflector. Then pull out the
entire housing. |
|
 |
|
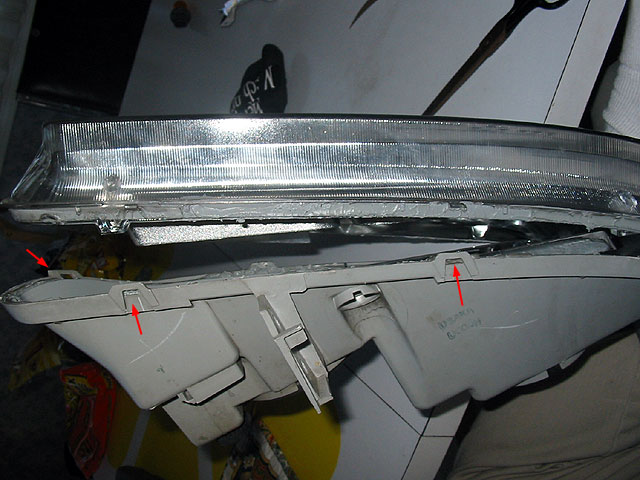
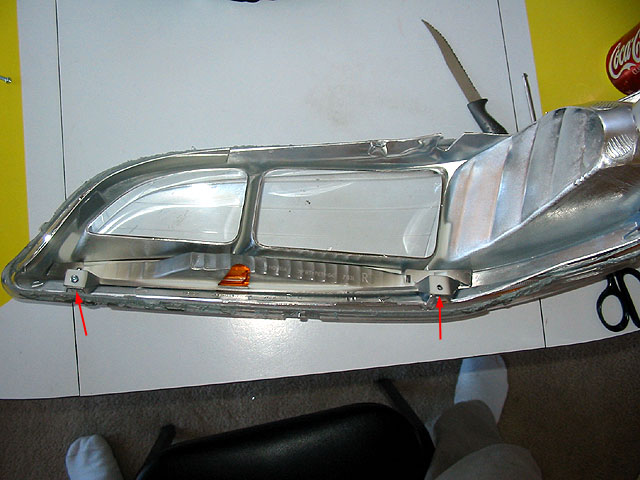
Turn the housing around and you will see
the orange strip at the bottom. Pop out the clips holding it on and
it will come out in two pieces.
Now everything is fully disassembled, so on to the next phase. |
|
 |
|
| Disassembly | Reassembly |
|
|
| |
|
|