| |
|
click for a larger image |
I just ordered an Acura TL Type S 19mm
Rear Sway Bar which should provide a stiffer rear suspension for my
car and help to reduce the understeer that is typical of a front wheel
drive sedan. This bar is 2mm wider in diameter than the stock Accord
bar which is 17mm. That's a 11.7% increase in width, which corresponds
to almost a 25% increase in area, which should mean about a 25% increase
in stiffness.
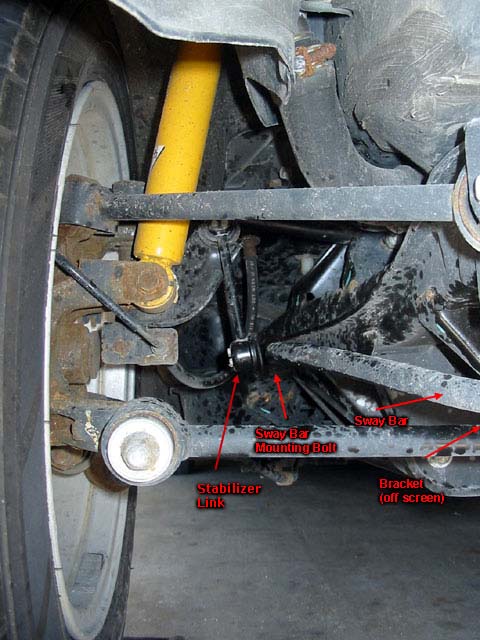
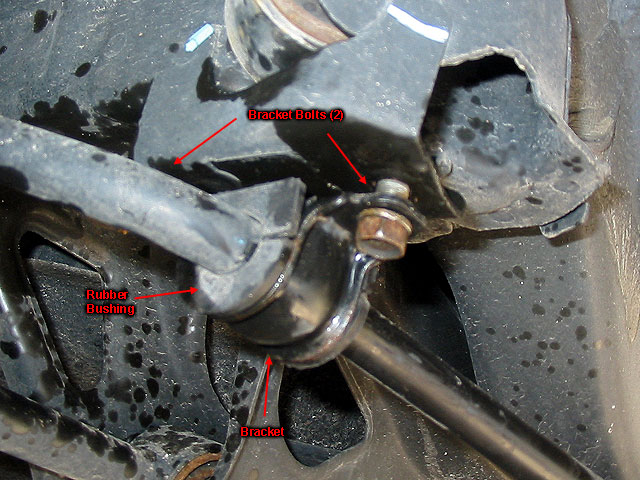
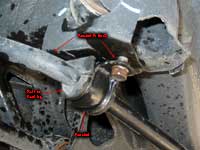
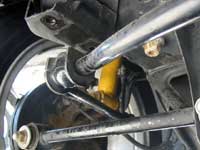
Here is what the left rear suspension looks like from the back. The
bracket that attaches to the chassis is off the image. Note the stabilizer
link. In a normal installation you don't need to change this part
but I had problems that required me to replace the left one. This
will be discussed after the DIY. |
|
 |
|
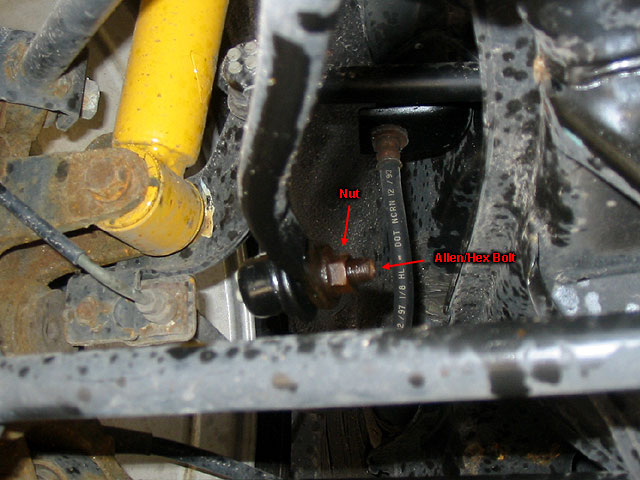
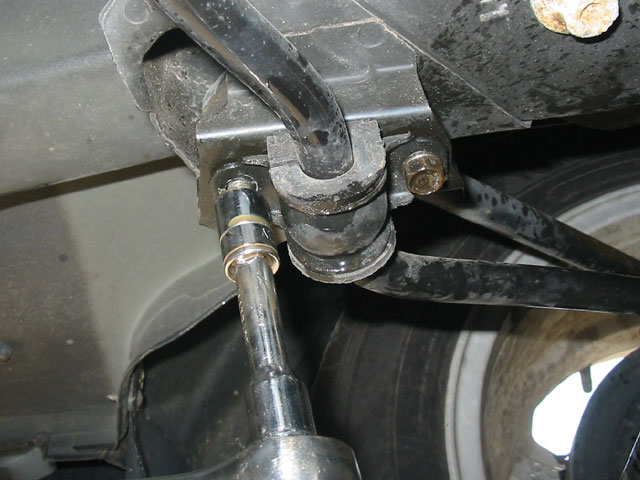
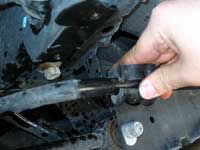
Here's a close-up of the bolt that connects
the sway bar. Because the sway bar must move with the suspension,
the bolt has a hex/allen key hole so you can hold it stationary while
you loosen the nut attaching it.
This bolt is extremely difficult to remove b/c of the rust and also
because with the allen key, you can't just use a regular socket wrench,
you need an open wrench that will allow the allen key to be inserted.
You should elevate the car using ramps as you want to keep the suspension
compressed to releave part of the tension on the bar. |
|
 |
|
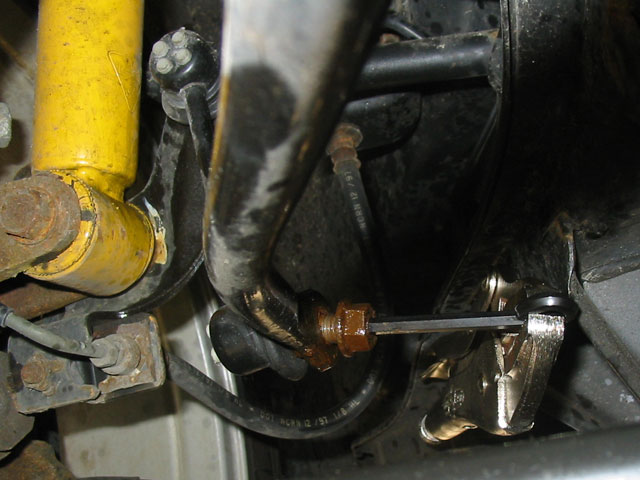
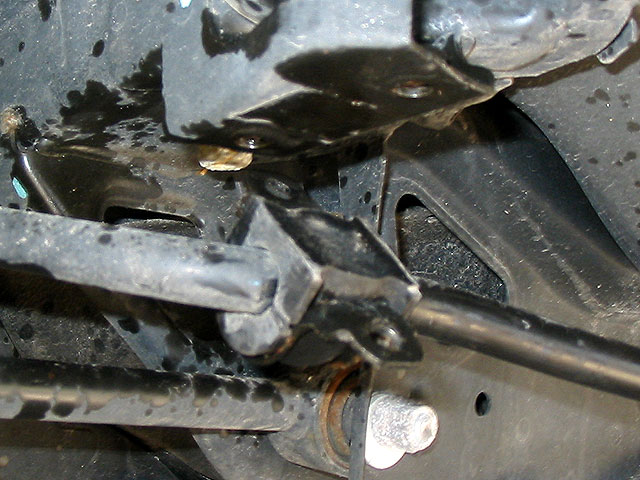
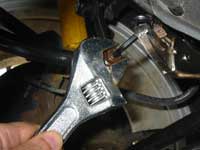
| You will need a 5mm metrix Allen/Hex wrench.
It's a tight position so you may need to separate your allen key from
your ring or whatever. Also, these are tight nuts so an allen wrench
isn't going to give you enough leverage. Some people have used pipes
to slip over the end of the allen wrench to get more leverage, but
here you can see that I've used a vise grip. I've positioned the vise
grip in between some other parts of the suspension so that it will
hold itself in position. |
|
 |
|
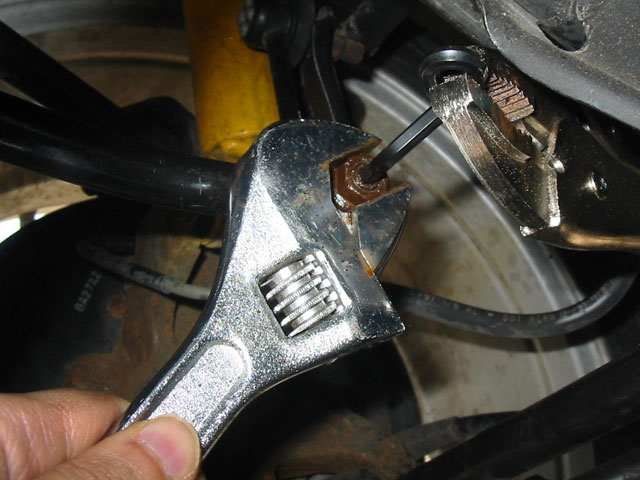
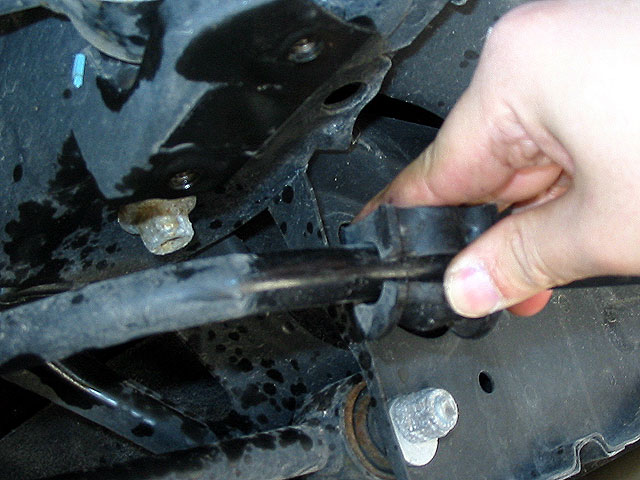
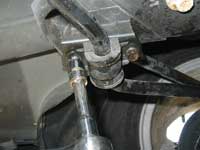
Now that the allen wrench is secured,
you can use a crescent wrench to start loosening the nut. You should
use plenty of WD-40 and might want to clean off any rust that has
built up on the threads of the bolt. A wire brush would be handy for
this, or you can use a wire brush attachment on a dremel.
I didn't do clean my bolts and some of them got jammed which resulted
in stripped bolts. Right now I'm just going to talk about how it's
SUPPOSED to be done and then at the end I'll talk about the problems
I had. |
|
 |
|
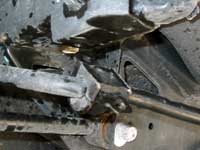
| Once you've gotten the end nuts removed
you can remove the brackets holding the sway bar to the chassis. Here
is a close up of the left bracket. The sway bar is seated in a rubber
bushing that fits in the bracket, which is connected using 2 bolts
to the chassis. |
|
 |
|
| These bolts aren't as tough as the end
nuts, but you should still use plenty of WD-40 as needed. |
|
 |
|
| Here is the bracket once the bolts have
been removed. |
|
 |
|
| You can now pull the bracket off the bushing
pretty easily. |
|
 |
|
| The rubber bushing has a slit in it that
you can push apart which will allow you to remove the bushing. Of
course, you don't really need to do this since you'll be removing
the entire bar, bushing and brackets and replacing them with new ones. |
|
 |
|
Preparation |
Installation
|
|
|
| |
|
|