| |
|
Click an image to enlarge. |
|
After 70,000 miles, my car developed a vibration during braking.
I suspect it is caused by the rotors (discs) warping (also called
run out i think). I'm not sure what caused it but maybe it was when
I accidentally touched snow onto the hot discs while cleaning my
wheels in the winter. As a result, I don't feel confident in my
car's braking. I could get my rotors re-surfaced, but with so many
miles I decided that it was time to replace the rotors completely.
|
|
Please take a look at my
brake pad DIY and my wheel changing
DIY for some basic information. I will assume you've already read
them and will skip over some of those details in this DIY. Keep in
mind that this is for a LX Accord which only has front discs and NO
ABS. I believe ABS and V6 versions are slightly different but this
will give you an idea.
I decided to buy Brembo blank rotors which are a stock replacement
but are cheaper than OEM. I purchased them from www.hondiscountparts.com. |
|
 |
|
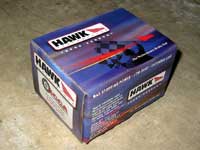
| It is recommended that when you install
new rotors, you also get new pads, so I decided to upgrade to Hawk
High Performance Street (HPS) pads based on recommendations from www.honduh.com,
which I bought from www.tirerack.com.
According to the box, they're recommended by the SCCA. How convenient. |
|
 |
|
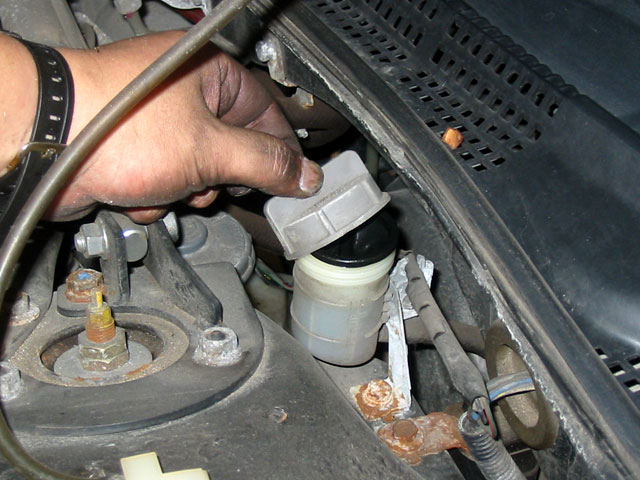
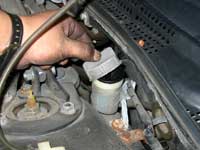
| To get started, jack up your car, pop
the hood and loosen the cap to the brake fluid reservoir. When you
reset the brake pistons, the fluid will need somewhere to go. |
|
 |
|
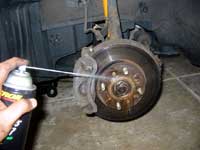
| Remove your wheels and clean the rotors
by spraying them down with brake cleaner, which is designed to dissolve
the tough grime and brake dust. Note that brake dust is not good for
your health, so don't blow it into the air, use the solvent to rinse
and wipe it away. |
|
 |
|
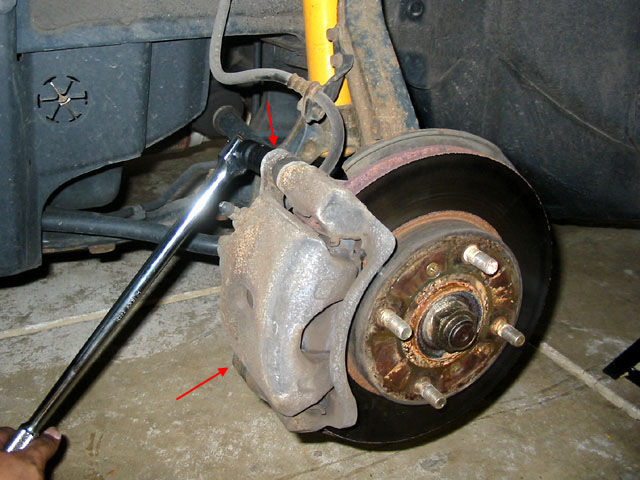
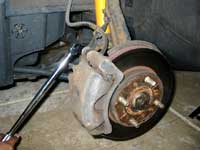
| Take out the caliper pins. There are two
of them, one at the top and one at the bottom. As I mentioned in the
brake pad DIY, these are a bit tricky to get to b/c they are behind
the rotors and are fairly tight (80 ft-lbs). |
|
 |
|
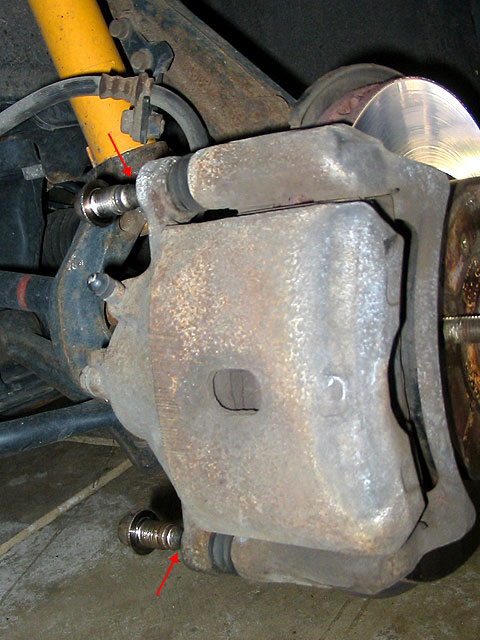
| Unlike the brake pad DIY, we need to remove
both pins. Just unscrew them then pull them out and put them somewhere
clean. |
|
 |
|
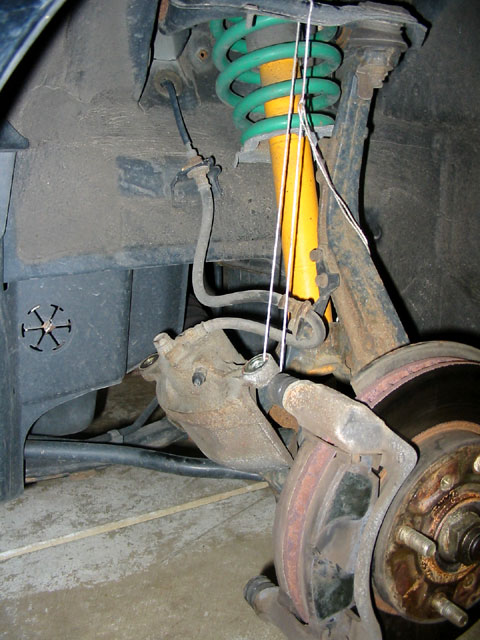
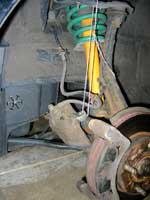
Once the pins are out you will need to
pull off the caliper. However, the brake line is still attached and
it's best that you leave it that way. To get around this, use a wire
or some twine to hold up the caliper b/c you don't want it's weight
pulling on the brake line.
You may want to use some of the brake cleaner to clean up the pin
holes on the caliper. |
|
 |
|
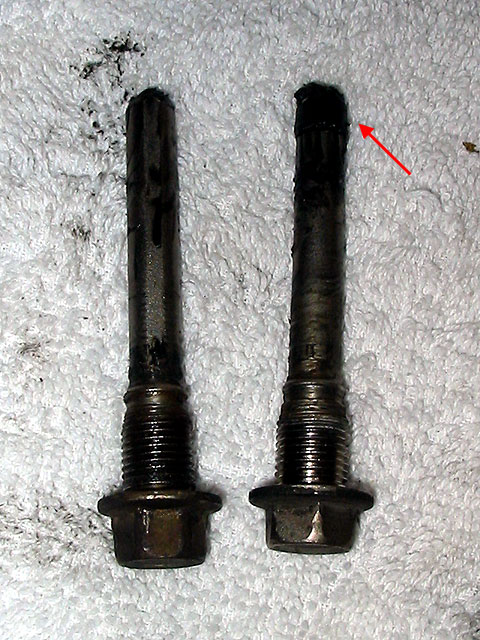
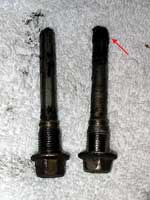
| Real quick, take a look at the pins. Note
that one pin has a little rubber end. This is the upper pin so remember
that when you reassemble the calipers. |
|
 |
|
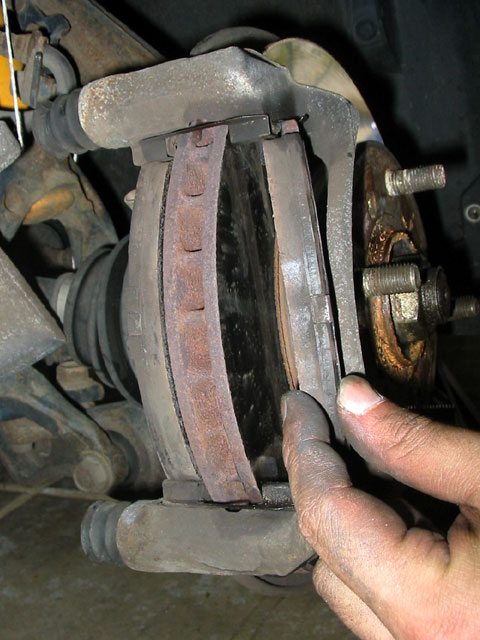
| Remove the brake pads from the caliper
bracket. |
|
 |
|
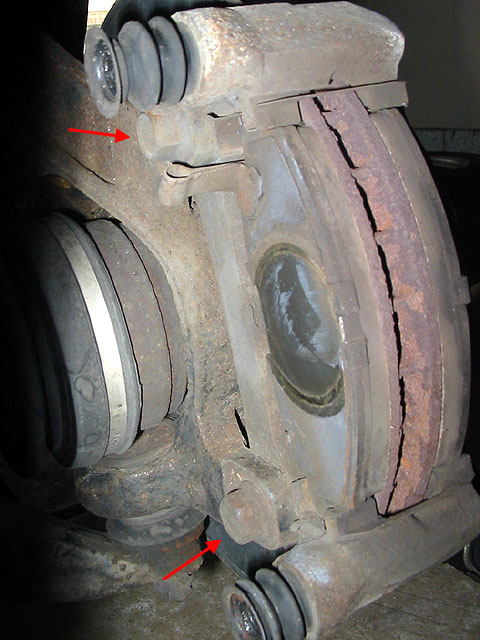
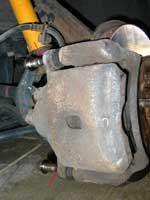
| Next take out the caliper bracket bolts.
These are just as hard to get to as the pins b/c they are also behind
the rotor. I took this picture by sticking the camera into the wheel
well behind the rotor so you know where they are. |
|
 |
|
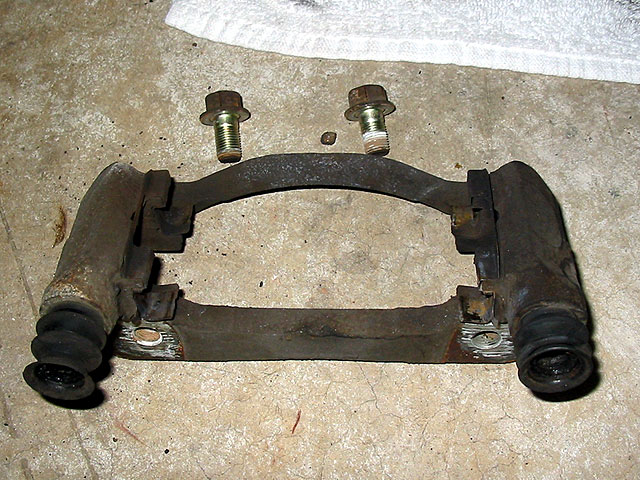
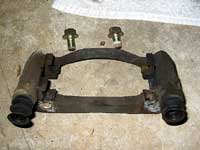
| Once the bolts are removed you should
be able to pull off the caliper braket. You may want to use the brake
cleaner to clean the bolt threads and the holes on the bracket. |
|
 |
|
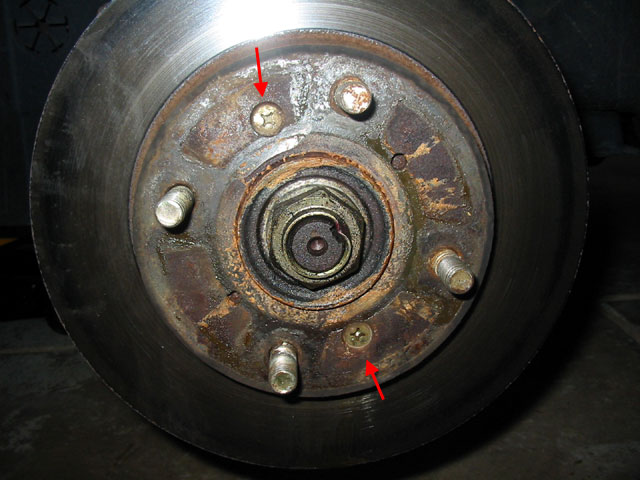
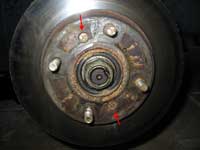
| The rotors are held on by two screws.
Since these have been on there for a long time, they could be pretty
hard to get out. Most likely you will not be able to get enough torque
with just a screw driver. See my notes on the next page about the
proper tools to use. |
|
 |
|
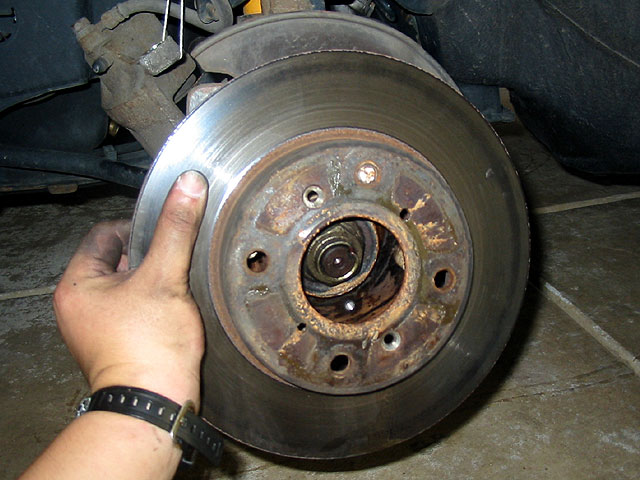
| Once the screws are gone, you should be
able to pry off the rotor. If not, simpy run bolts through the extra
screw holes to force the rotor off (I think maybe the screws you just
removed will fit, but I didn't try b/c i didn't need to). |
|
 |
|
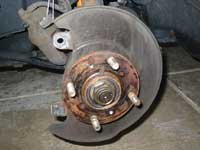
| Here is the empty hub with everything
removed. Pretty nasty. Spray it down with the brake cleaner which
seems strong enough to remove just about anything. Also spray the
lugs and wipe it all down to get any debris off. |
|
 |
|
| Preparation | Installation |
|
|