| |
|
Click an image to enlarge. |
|
After 70,000 miles, my car developed a vibration during braking.
I suspect it is caused by the rotors (discs) warping (also called
run out i think). I'm not sure what caused it but maybe it was when
I accidentally touched snow onto the hot discs while cleaning my
wheels in the winter. As a result, I don't feel confident in my
car's braking. I could get my rotors re-surfaced, but with so many
miles I decided that it was time to replace the rotors completely.
|
|
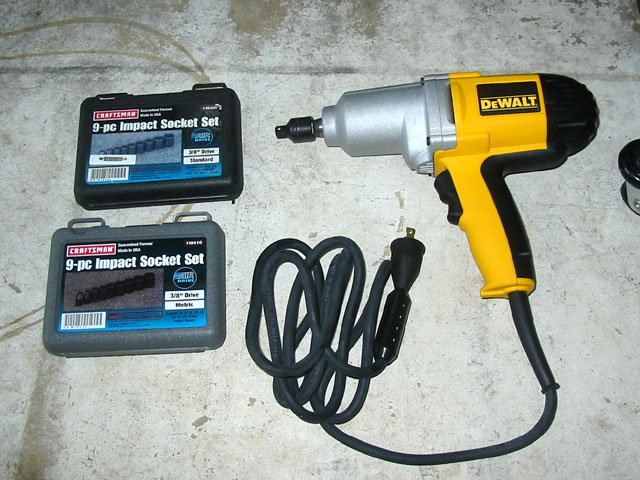
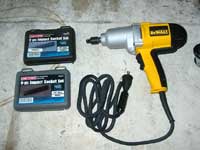
| Due to horror stories about how difficult
it was to get out the rotor screws, I decided I needed a bigger tool.
People have mentioned an impact screw driver which is designed to
turn when struck with a hammer. This force will keep enough force
on the screw driver for it to turn without coming loose and stripping
the screw. I couldn't find one though, but I've always wanted an impact
wrench. The air compressor route is expensive to do right, so I decided
to try out the latest electric impact
wrench from DeWalt. This thing took off the screws with just 2
impacts. |
|
 |
|
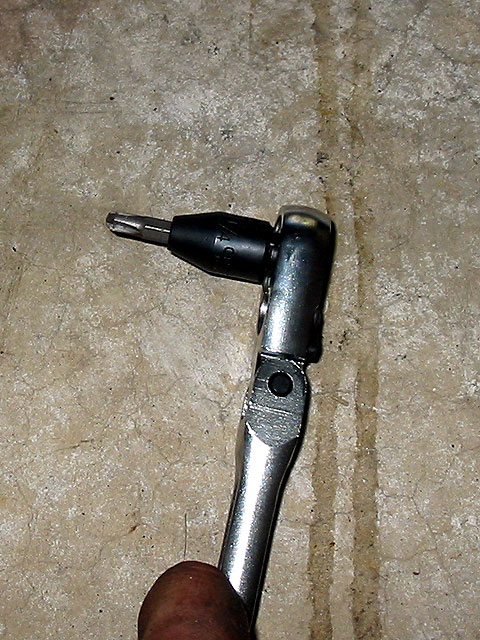
But then I found out that the screws are
only supposed to be torqued to about 6-9 ft-lbs (the book i had said
80 in-lbs and the Brembo instructions said 90 n-M, both of which come
out to less than 10 ft-lbs I think). So I didn't really need the impact
wrench, I just needed a regular ratcheting wrench with a 1/4"
adapter to fit my Philips screw bit and give me a little more leverage.
They came out with a good tug.
If you're having trouble using a wrench this way b/c you can't exert
enough force onto the screw, try applying pressure on the head of
the wrench with your foot (or a friend's) while turning with your
hand. If that still doesn't work, then you may have to look into some
impact tools. |
|
 |
|
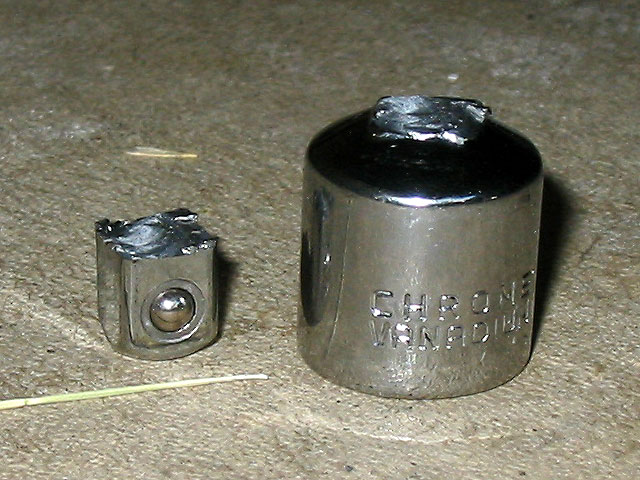
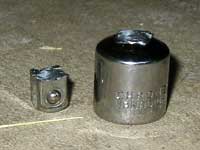
Oh, and if you do end up using an impact
wrench, get impact sockets. Chrome sockets just aren't that strong
and can break with enough force or even after a lot of use. When using
an impact wrench, the torques exerted could easily cause weak metals
to shatter and launch shrapnel around. Not good.
Luckily that didn't happen to me because I wasn't using chrome sockets
on an impact wrench, but this is still a good example. I broke this
chrome 1/2"-3/8" socket adapter BY HAND trying to get the
caliper bracket bolts off. They weren't even on that tight, maybe
100 ft-lbs max, but I suspect it was less b/c I wasn't putting that
much force on my 18" breaker bar. The metal just twisted right
off. Real pretty. Good thing I recently bought an impact grade adapter
just in case... |
|
 |
|
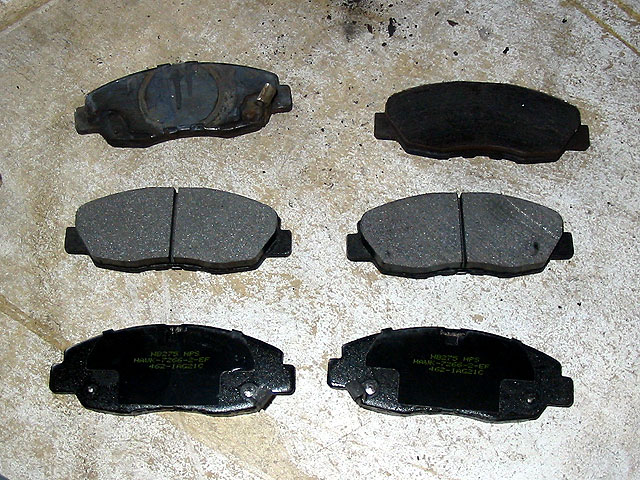
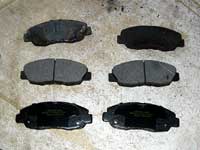
| Here's a comparison of the new Hawk High
Performance pads against some OEMs along the top. You can't tell that
much but you can see some difference in design. |
|
 |
|
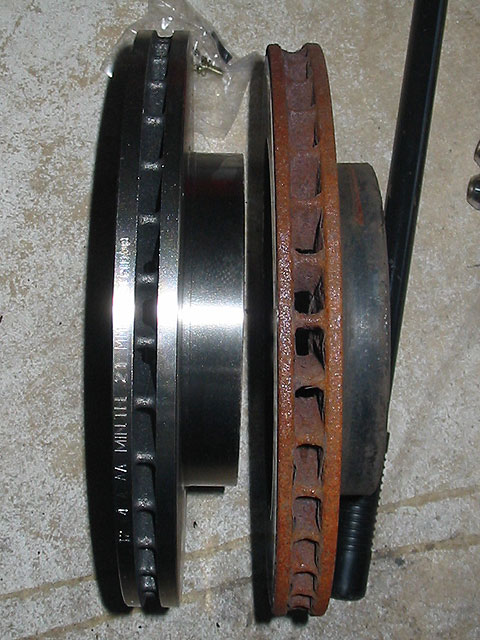
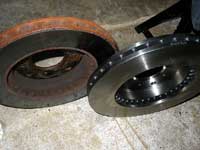
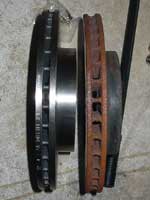
| Here's a comparison of the Brembo rotors
against the OEMs. Man, those old ones are crusted with rust... gross... |
|
 |
|
| Another view of the rotors. I wonder if
the Brembos will look like that one day. |
|
 |
|
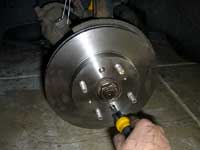
Spray the inside of the new rotor with
brake cleaner and wipe dry. Since rotors rust, they are shipped with
a thin coating to protect them so this should be removed. Mount the
new rotors and attach them with the new screws provided to 7-8 ft-lbs.
Just hand tighten them with a screw driver so they are secure, but
they don't have to be too tight. Even if they came loose, there's
nowhere for them to go anyway since the wheel will be up against the
rotor. Some cars don't even have these screws and rely on the wheels
to hold the rotors on.
Now clean the outside with the brake cleaner. |
|
 |
|
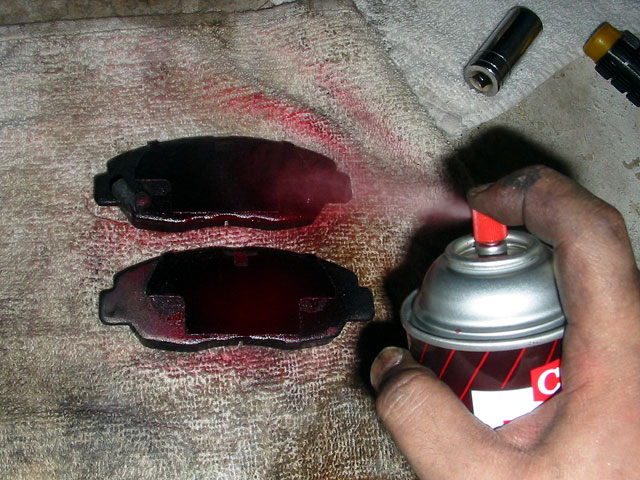
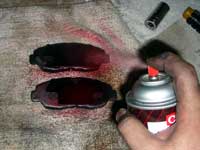
| Replace the caliper bracket and bolt it
back in. My Haynes manual said they should be at 54 ft-lbs. Then prepare
the brake pads by cleaning them with brake cleaner, for the same reason
as the rotors above. The OEM brakes came with graphite lube for this
purpose but the Hawks did not so I picked up a can of anti-squeal
which you simply spray onto the back (DO NOT spray it onto the actual
brake material). |
|
 |
|
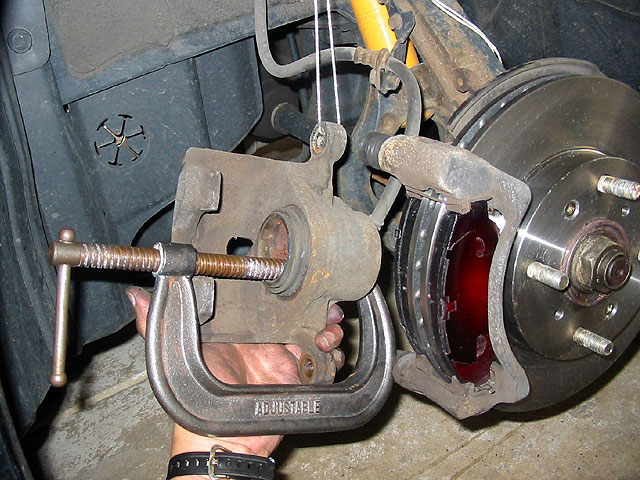
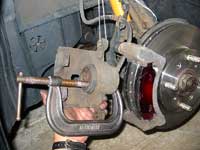
Use a large C-clamp to compress the piston
back into the caliper so it will fit the new pads. Keep an eye out
on the brake fluid reservoir so it doesn't overflow (I forgot and
spilled some).
|
|
 |
|
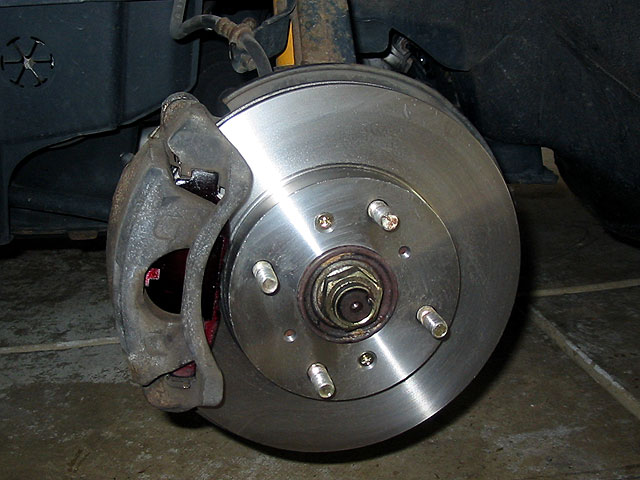
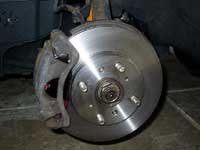
Reattach the caliper making sure the rubber
seals for the pin are not folded or anything. You're done! Ain't they
pretty? Not for long!
Put your wheels back on and proceed to the other side. Oh, you may
want to close your brake fluid reservoir and pump your brakes a bit
first to force as much fluid back into the system. This will reduce
the chance of overflowing the brake fluid reservoir when working on
the second side. |
|
 |
|
When you're done, you will
need to break in the new rotors and pads. Start off slow with light
braking, just to make sure they work. Then start driving to higher
speeds and braking to a stop. Hawk recommends 6-10 runs of 30-35mph
with medium braking to a stop, followed by 2-3 runs of 40-45 with
strong braking to a stop. Brembo recommends avoiding prolonged braking
(more than three seconds), avoiding braking lightly for long times
and avoiding excessively hard braking for 200 miles.
Some people also talk about heat cycling. Warming up your brakes (which
is why you start at lower speeds) then braking harder, then letting
them cool off completely, then repeating the process. I just finished
my second heat cycle and I can already tell that the new pads and
rotors grip really well. Do note that during break in you will smell
nasty burnt odors but that's normal.
Difficulty: 3/5. Really not that difficult. Like brake pads it sounds
intimidating b/c they are a crucial safety item, but anyone with a
little mechanical aptitude can do it.
Time: For my first time, it took me a little over 2 hours. I'm sure
it would only take less than 90 minutes if I did it again. |
|
| Preparation |
Installation |
|
|