| |
|
click for a larger image |
I decided to do all the threading first and cut the
shifter later. If you wish, you can cut the shifter first and then
thread the last inch alone instead, which could save you some time
since you don't need to thread the entire shifter (including a part
that will get cut off).
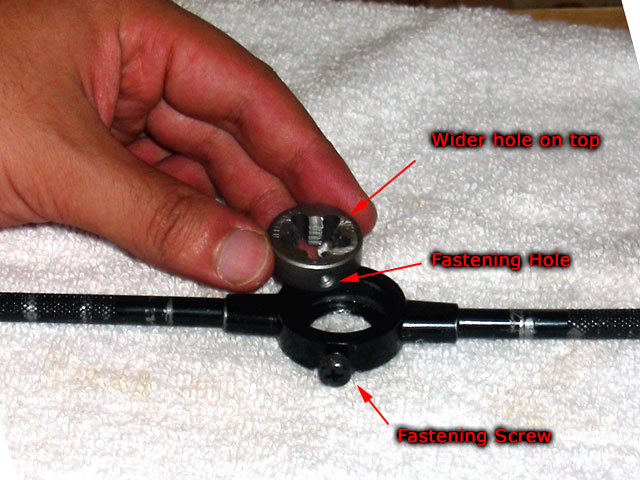
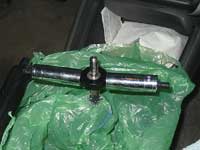
Select the die you wish to use. Note that one side of the die has
a larger hole than the other. This is the starting end and should
be facing up in the die wrench. Line up the hole in the side of the
die with the tightening screw on the wrench and tighten it. |
|
 |
|
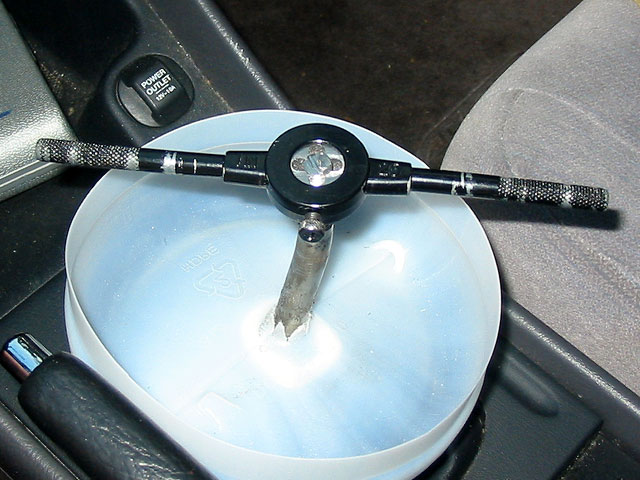
Slip the die over the shifter and start turning (clockwise,
since you're basically trying to "screw on" the die). Since
I didn't have a M13 die, I used a 1/2" die.
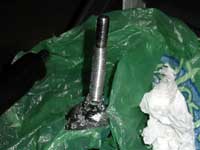
Starting the first cuts were the hardest as you have to keep rotating
and pushing down so that enough metal is trimmed away for the threads
of the die to actually catch. It
took me about 15 minutes of turning and applying pressure before the
threads actually caught. |
|
 |
|
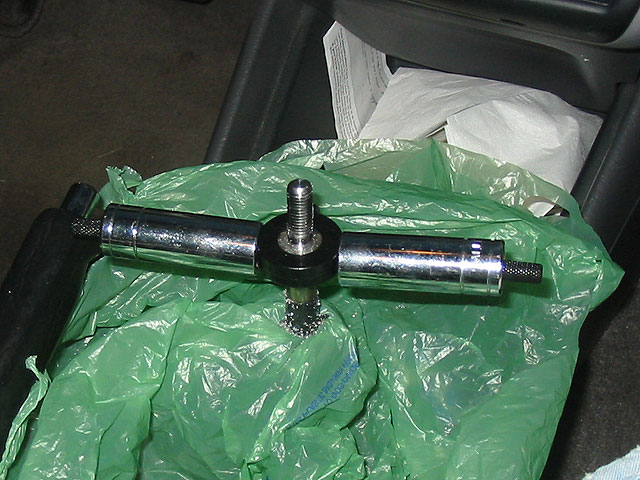
I found that the die wrench in my set was very short
and was very difficult to turn. I ended up using some sockets to make
it more comfortable. Here you can also see the the plastic bag I originally
used instead of the plastic jug to catch the shavings.
Once the threads caught, it took me about 10 minutes to cut 3"
of thread down the shifter. Note that the force you are putting into
cutting the shifter and the friction creates a lot of heat. After
my first die, the whole shifter rod and the die wrench were very hot
to the touch. |
|
 |
|
Between dies I rested in order to let the shifter and
wrench cool off. When you're done with the first die, switch to the
next die and repeat for all the dies.
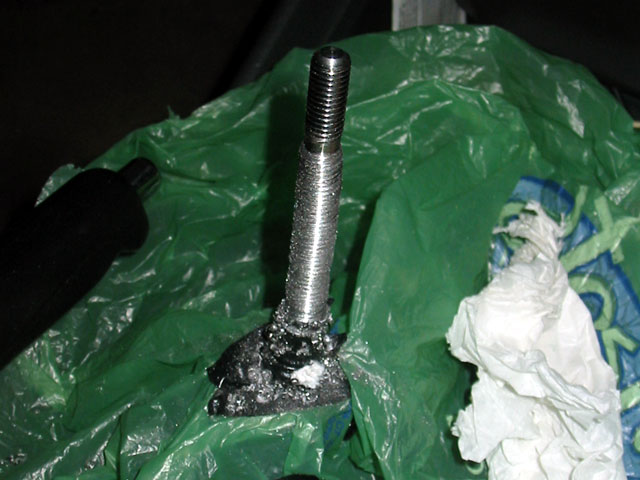
Here you can see what my shifter looks like after two dies. If you
notice the threads aren't quite even. This is because my first die
was a standard measure die with a different thread pitch so it doesn't
match up evenly with the metric dies. That's ok for now since the
final two dies will cut all this surface away and replace it with
nice smooth even threads. |
|
 |
|
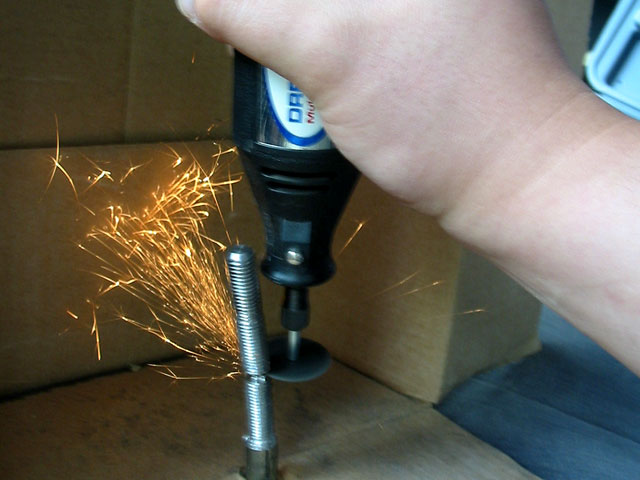
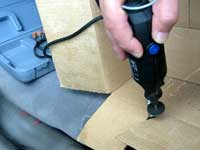
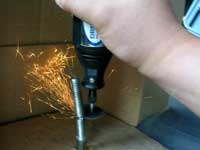
Once we're finished with all the threading, it's time
to cut the shifter. First get a cardboard box to catch all the sparks
and metal. I cut a slit in one side to fit around the shifter.
Then grab your dremel tool and your cutting wheel and go at it. |
|
 |
|
| I'm very happy with this picture. It was tough to take
a picture with one hand and cut with the other hand... I think the
sparks look cool. It's also amazing that I managed to snap the picture
at the moment that the cut went through and the top piece started
falling off! |
|
 |
|
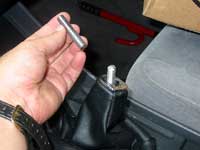
| Here's the piece that I cut off. I did it by eye, but
it came out to just about 2". This piece will also be very hot
from the cutting so handle with care. |
|
 |
|
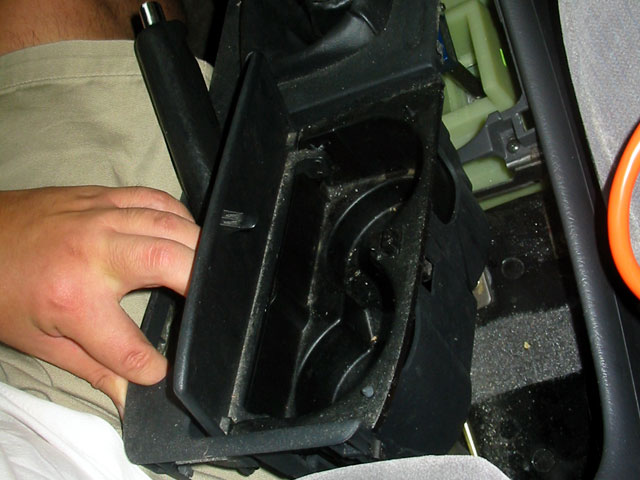
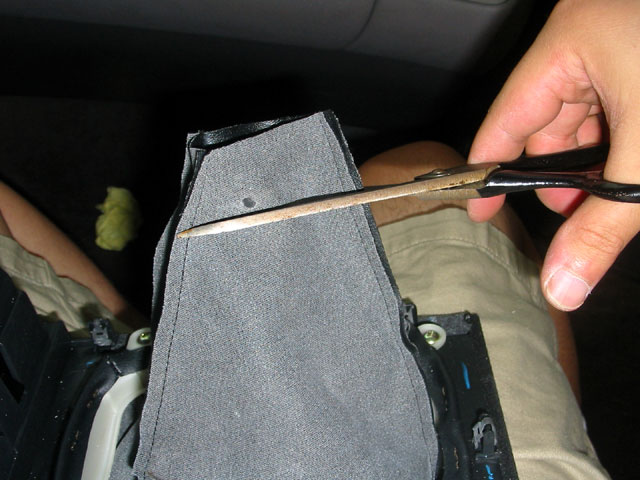
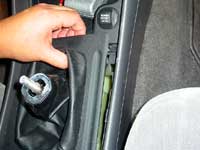
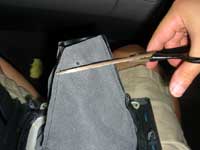
| Next item is to trim the shift boot as you now have
2" of excess leatherette. To do this, you'll need to pull up
the panel covering the shifter. You can start by grabbing under the
panel through the shift boot and lifting up on all four corners of
the boot to pop out the clips. |
|
 |
|
Next pull up on the cup holder (you can remove it completely
if you want) to free a couple clips. If you can, slip a finger into
the parking brake hole and pull up to release a clip there as well.
Now you'll be able to remove the panel completely. It will take some
finessing, I recommend pulling the parking brake up and shifting into
3rd gear. |
|
 |
|
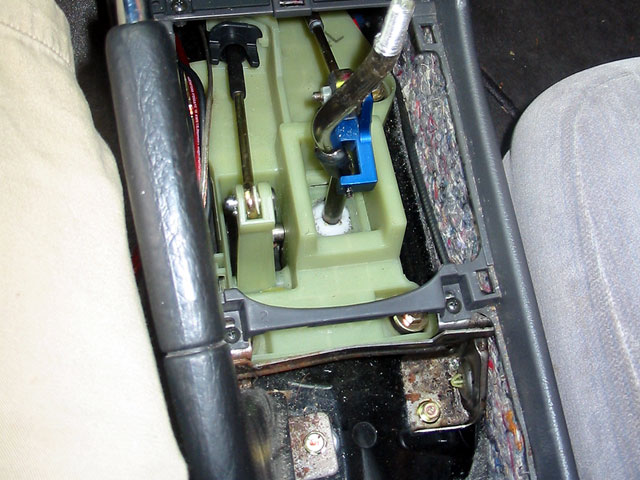
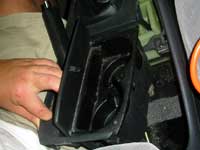
Here's what it looks like with it all removed. You
can see that blue short shift adapter that I
installed previously.
If you want, you can remove this panel before the threading and cutting
so that the boot isn't in your way and you have more space to work
with. |
|
 |
|
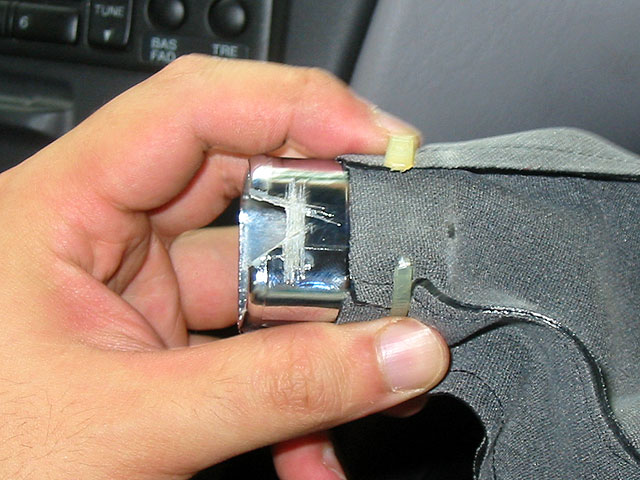
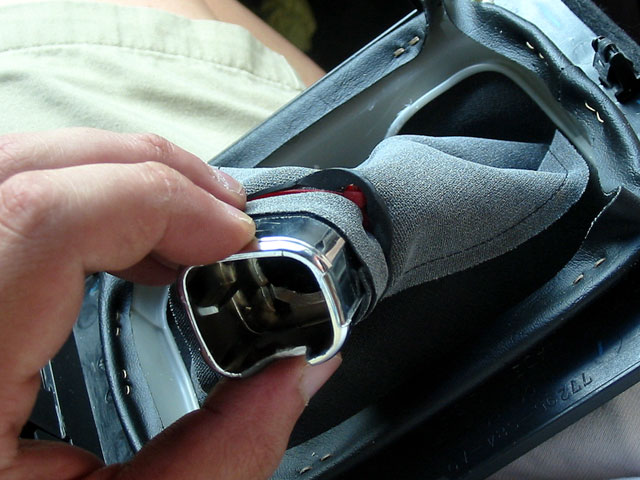
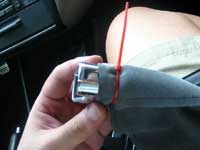
Once you've taken the panel off, turn it upside down
and pull the shift boot inside out. You'll see the plastic chrome
plated collar that connects to your shift knob. If you cut your shifter
pretty close to the bend, this collar won't fit properly so you may
need to cut a piece of plastic out as you can see here.
This plastic piece is attached to the shift boot with a zip-tie covered
with a rubber band. Remove the rubber band and cut the zip tie to
release the plastic piece. |
|
 |
|
| Now trim the shift boot. I cut it about 1.5" since
it's better to have a little too much than a little too little material. |
|
 |
|
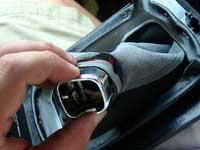
| Slide the plastic piece back up (make sure the cut
in the plastic is on the correct side), wrap the shift boot around
it and zip tie it in place. |
|
 |
|
| Tighten and trim the zip tie. Replace the rubber band.
You'll notice the rubber band has two bulges on it, these should go
around the end of the zip tie so it doesn't rub against the shift
boot. |
|
 |
|
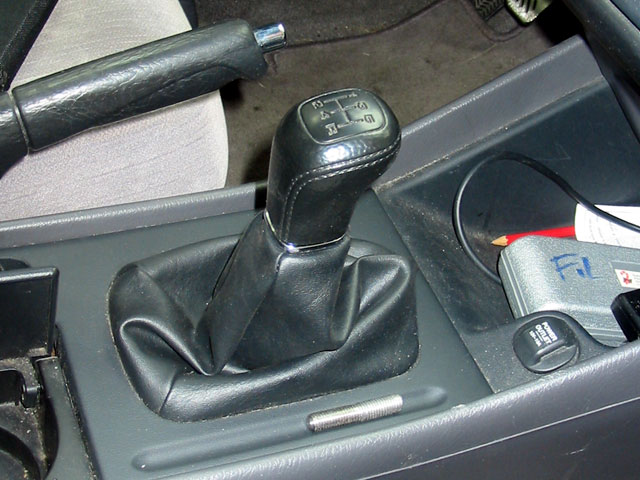
Turn the shift boot right-side out again, replace the
whole panel.
At this point you should attach your shift knob and make sure everything
is to your liking. I found that I cut the shifter a couple millimeters
too short and that the shift knob remained a bit loose when attached
so I ended up wrapping electrical tape around the threads then putting
the shift knob back on. |
|
 |
|
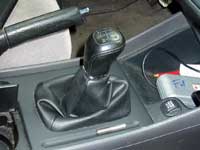
Once that was done, I screwed the shift knob back on
and got it pretty tight, then reattached the shortened boot and it
came out very nicely. Here's what it looks like when it's done.
My only complaint is that my shifter used to be the perfect height
for me to rest my wrist on while changing radio stations but Ican
deal with that. |
|
 |
|
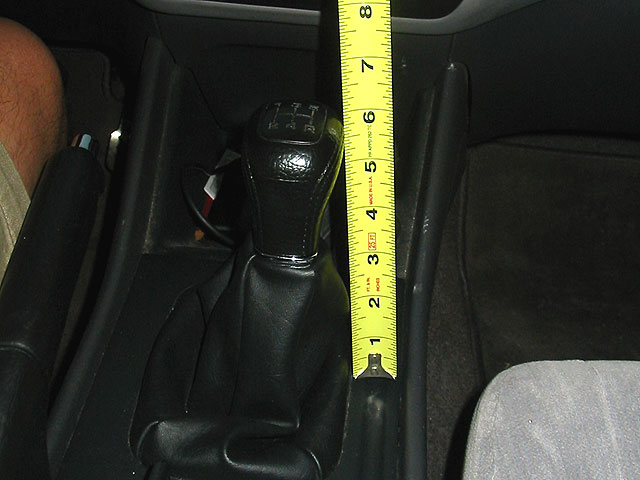
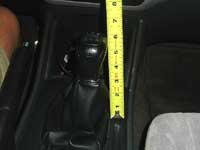
One last measurements confirms that it has been cut
2" (25% shorter). Combined with the short shift adapter (maybe
a 10% decrease) the total reduction is about 35-40%
I drove it around and it feels great! I love it! It makes shifting
much easer and feels much nicer! Combined with the short shift adapter,
this makes shifting less of chore since you don't have to be moving
around so much! And it seems to have cured the grinding into 2nd gear
that I noticed with the adapter alone.
|
|
 |
|
| Preparing the Shifter | Cutting
the Shifter |
|
|
| |
|
|