| |
|
click for a larger image |
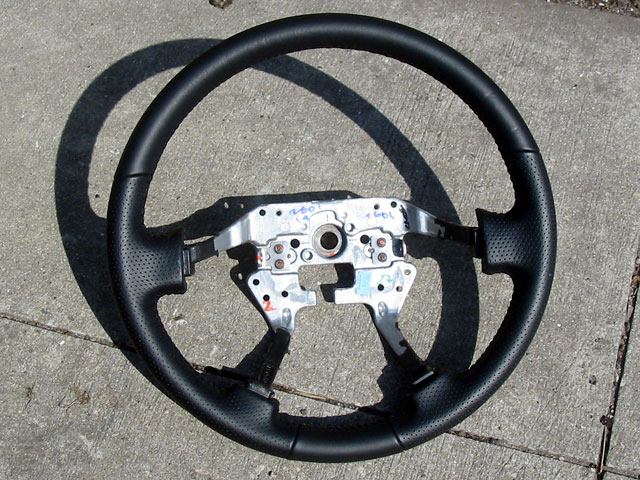
When I went to pick up my Acura
TL Type S Rear Sway Bar, I asked if they had any leather steering
wheels around and they had one for an MDX. The service rep said that
it didn't fit on a TL before so he doubted that it would fit on my
Accord. But he said I could try it at my own risk and because of that,
he gave it to me for free! Here is what it looks like on it's own.
If using a MDX wheel, make sure you have a 2001 or 2002. Only those
models will fit. I believe that only 2002 and previous CL and TL wheels
will fit as well, though I am not sure so check another source. |
|
 |
|
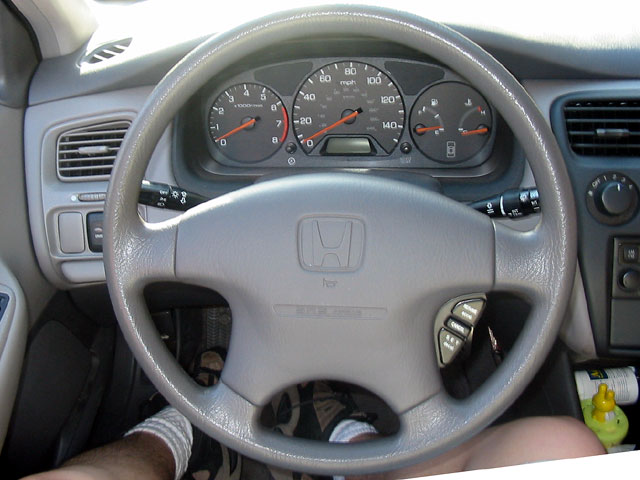
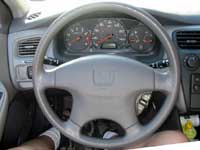
Here is the stock wheel. My main complaint
is that the wheel just feels thin and cheap. Compared to all the rental
cars I've driven, even similar low end Subarus, the Accord wheel feels
much worse.
The MDX leather wheel is thicker, a little softer and much more pleasant
to hold. Since I got it for free, it was definitely a good investment!
:) The mods I needed to do were very minor and will be detailed on
the next page. Keep all screws and hardware as you will re-use them
(unless otherwise specified). |
|
 |
|
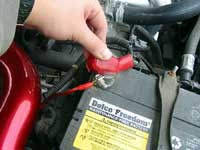
IMPORTANT!!!
The very first thing you must do is disconnect your battery. You must
then let your car sit for a few minutes to let the electrical system
completely power down. The reason you do this is because an electric
current that might run through your airbag when you disconnect it
could cause it to go off and hurt you, as well as cost you a pretty
penny to replace. To be safe, you may wish to disconnect both terminals
of the battery to insure there is absolutely no current in the system. |
|
 |
|
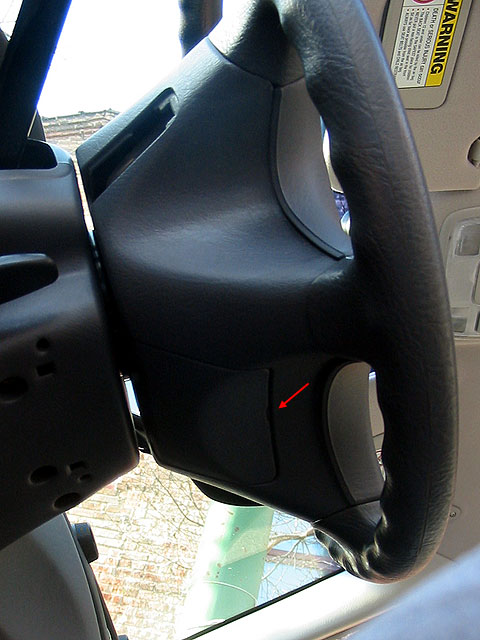
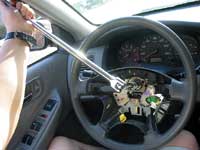
IMPORTANT!!!
Make sure your steering wheel and tires are pointed straight. This
way you'll be able to put the new wheel on straight and not be misaligned.
Otherwise, you'll need to undo everything and fix it.
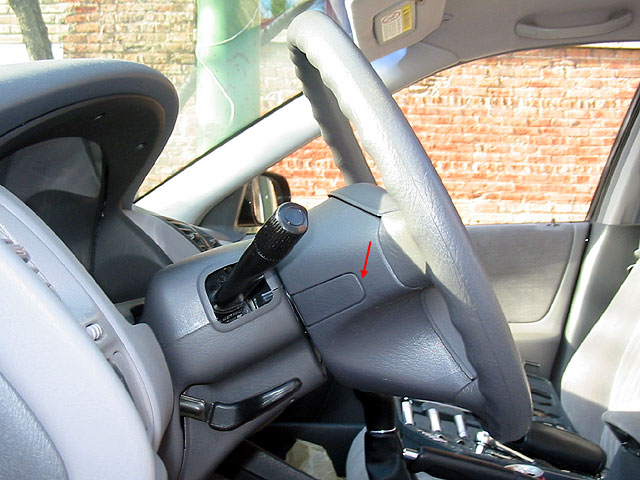
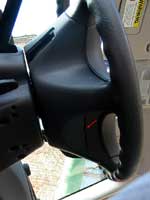
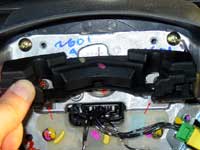
To remove your existing steering wheel, first get a flat head screw
driver and pop open the wire harness access panel on the bottom of
your steering wheel, right where the arrow is in the picture.
It should easily pop loose after which you can pull it off. |
|
 |
|
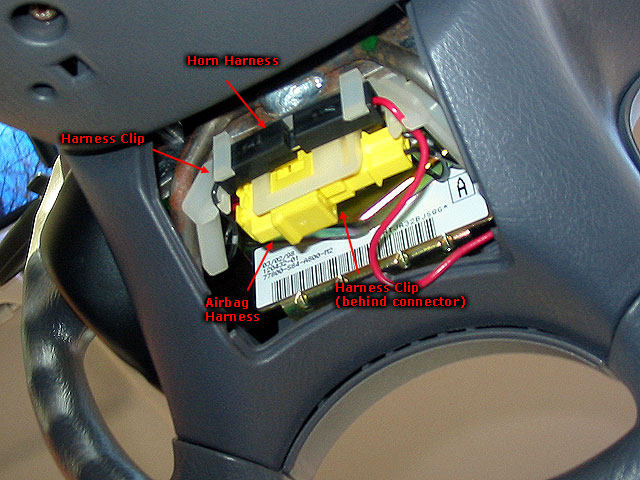
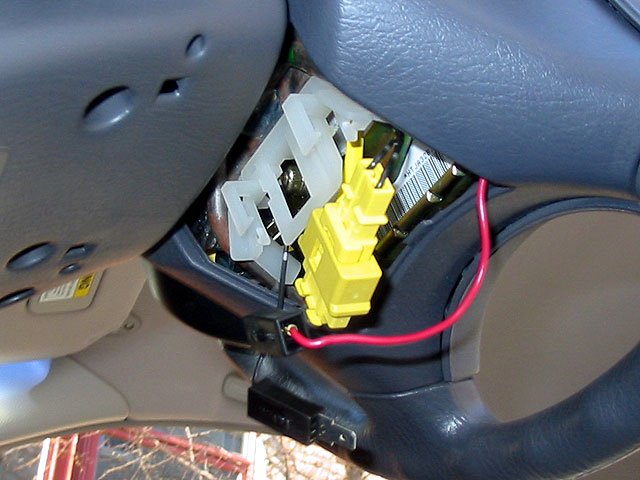
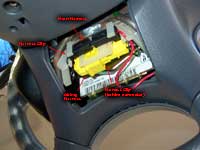
Inside you will see two harnesses. The
black one is for the horn, the yellow one is for the airbag. The easiest
way to disconnect them is to start by removing them from their clips.
Use the screw driver to push aside the clips holding the harnesses
and you can pull them free. |
|
 |
|
| Disconnect the two harnesses. |
|
 |
|
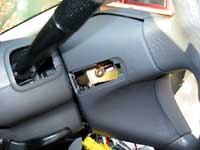
On each side of your steering wheel there
are two more access panels. Again remove these by inserting your screwdriver
at the point marked in the picture.
It should pop free pretty easily and then you should then be able
to pull the piece off. |
|
 |
|
Inside is a Torx screw (size T30 I believe)
which are screws with a special star shaped head.
Remove the screw from both sides. |
|
 |
|
|
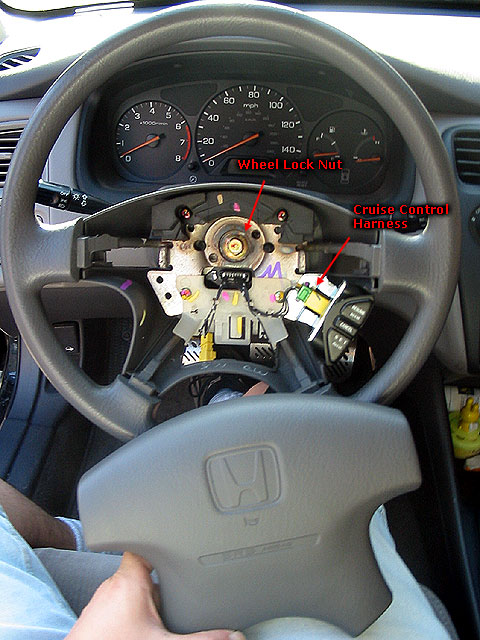
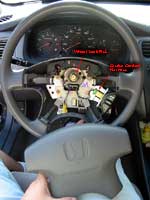
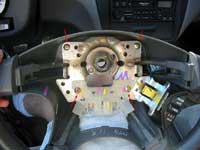
The airbag should now be easy to remove. Simply grasp it from the
top and bottom and pull lightly. It should fall away easily.
Disconnect the cruise control harness if you have it and free any
wires from any clips that may be holding them.
Also note the wheel locking nut in the center which will be removed
next.
|
|
 |
|
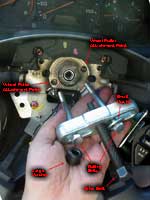
|
I had some difficulty removing this locking bolt. My steering wheel
did not lock when the key was removed so I had to hold the steering
wheel in place with one hand while loosening the bolt with my other.
My regular ratchet wrench made this difficult since it was too short
so I used a breaker bar instead. Once I got it loose, it was easy
to remove.
|
|
 |
|
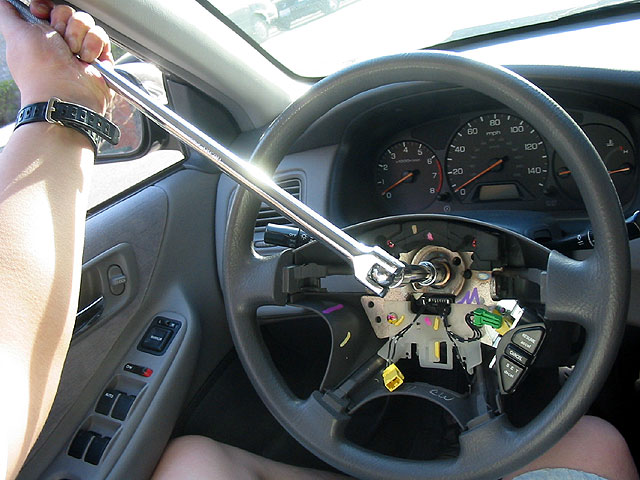
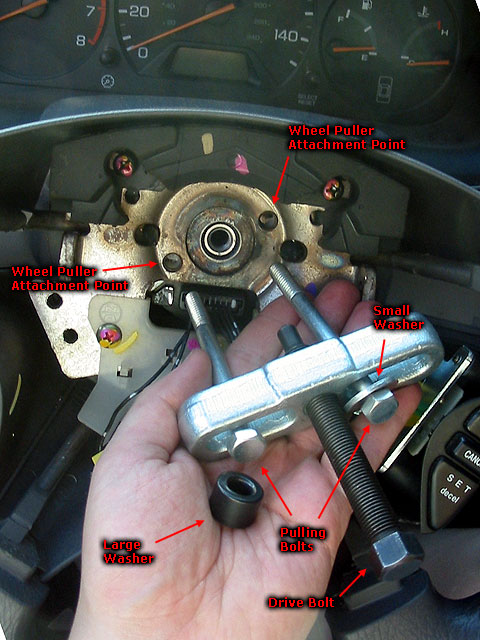
The next step can be done with brute strength,
but I recommend a steering wheel puller instead. I got mine at AutoZone.
It's free, you just need to put down a $15 refundable deposit (and
in my case, take a trip through the ghetto and fear for your life
as well).
The way it works is there is a main "drive" bolt that pushes
on the steering column (???) and two pulling bolts that attach to
the steering wheel. The three are connected with a metal bar that
allows the drive bolt to pull up on the pulling bolts. |
|
 |
|
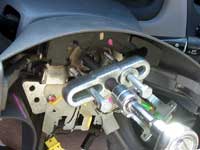
To use it properly, unscrew the drive
bolt most of the way. Insert the pulling bolts into the two holes
on the side and screw them into the appropriate attachment points
on the steering wheel.
Once your pulling bolts are secure, start tightening the drive bolt
until it fits in the hole and pulls the metal bar up to the top of
the pulling bolts. When it's there, start turning slowly and the steering
wheel will slowly be pulled off until it pops and is free. For me,
it only took a few turns to get there. |
|
 |
|
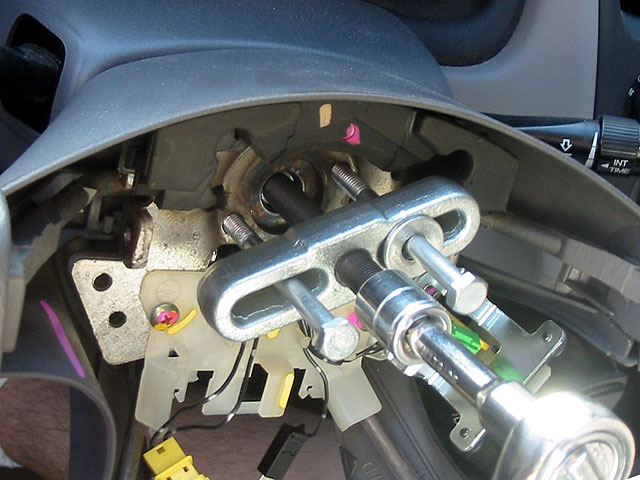
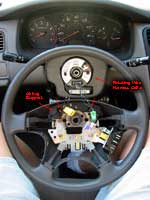
Now remove the steering wheel puller and
you can easily pull the steering wheel off the column.
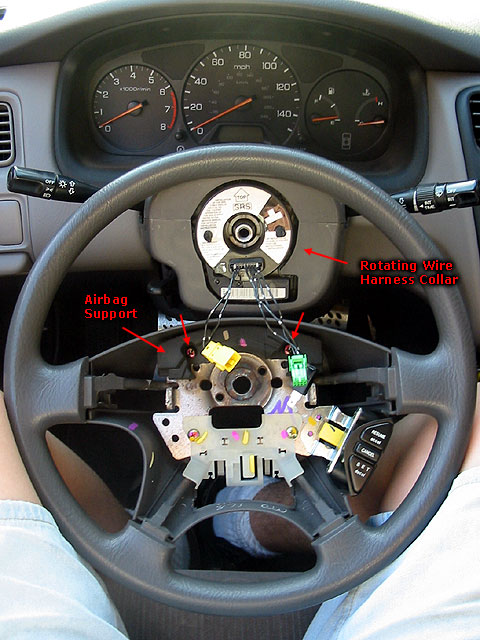
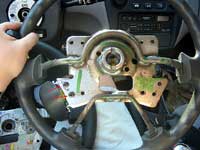
At the top of the casing around the steering wheel you'll notice a
black rubber bumper. This is a support for the airbag (I think) and
is connected with two screws.
Also note the rotating collar around the steering column. The wire
harnesses are connected through here so that when you turn your wheel,
the wires turn as well instead of getting all tangled up. Make sure
you don't spin this by accident (like I did) as it is easy to break
and render your airbag useless. |
|
 |
|
|
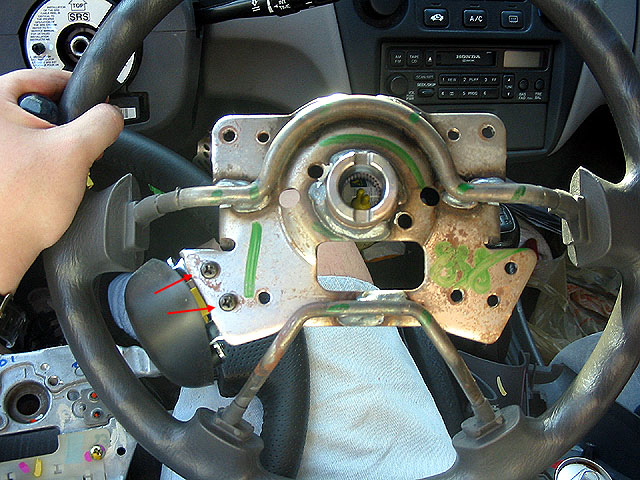
Remove the rubber airbag support by removing the two screws. These
two screws do not fit the MDX wheel so these will need to be replaced
(see next page)
You'll also notice that there are two little tabs that fit into
holes in the steering wheel as indicated in this picture. Not all
steering wheels have these holes. The MDX wheel does not have these
holes so these tabs will be modified (see next page).
|
|
 |
|
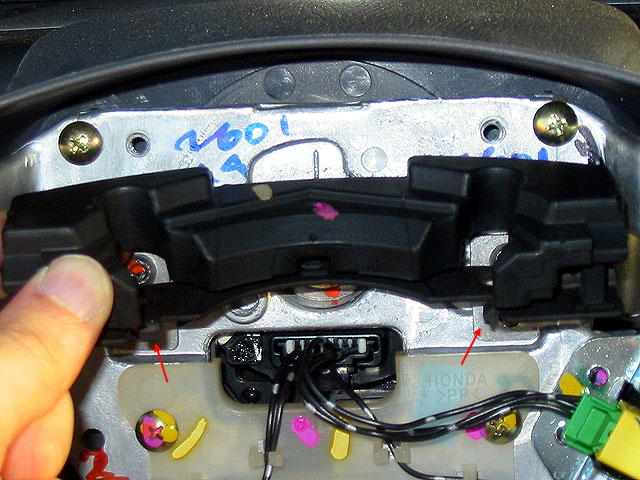
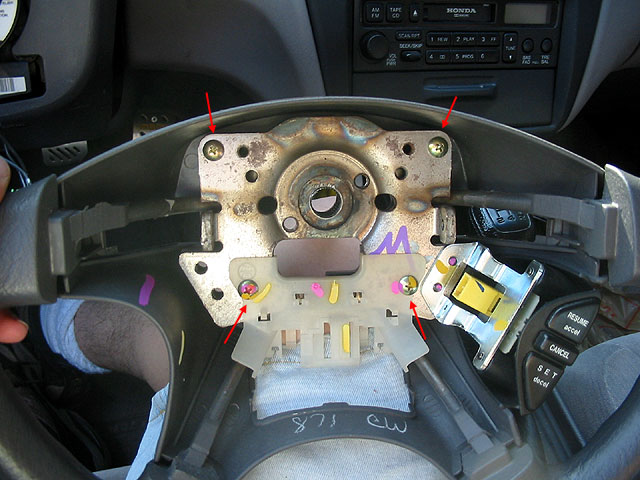
| Now remove the steering wheel casing by
removing the four screws indicated here. |
|
 |
|
| Look at the back of the steering wheel
and you will see the two screws holding on the cruise control module.
Remove these. |
|
 |
|
| Preparation |
Installation |
|
|
| |
|
|