| |
|
click for a larger image |
Sorry, i didn't get as many pictures as
I wanted b/c I was so frustrated from getting the bolts off the catalytic
converter (see header installation).
The stock exhaust is in two parts. The front part is attached by three
bolts to the catalytic converter and suspended by 2 rubber hangers.
It is connected to the rear part with 2 more bolts, and suspended
by 2 more hangers.
|
|
|
|
The cat bolts were all rusted so I went
to CarX and had them professionally removed and replaced for $30.
Back at home, disconnect your battery to reset the ECU. Then get under
the car and loosen the nuts attach the exhuast and the cat, but don't
remove them. Then remove the rubber hangers, which are like rubber
figure 8's that loop around pegs. Douse the hangers with WD-40 and
slide them off the chassis pegs.
|
|
|
|
Once all four rubber hangers are removed
from the chassis, lower the exhaust to the ground. Now you can completely
remove the nuts on the cat. Keep the bolts for the new exhaust. Now
you can pull off the old system and remove the hangers from it.
Once everything is off, putting it all back together is much easier.
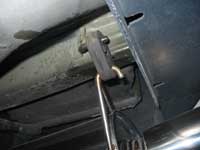
Take the new muffler and two of the rubber hangers and put them on
the exhaust support pegs (note that the hangers say which way is top).
Now go under the car and slip the hangers onto the chassis pegs. Here
you can see the rear-most hanger.
|
|
 |
|
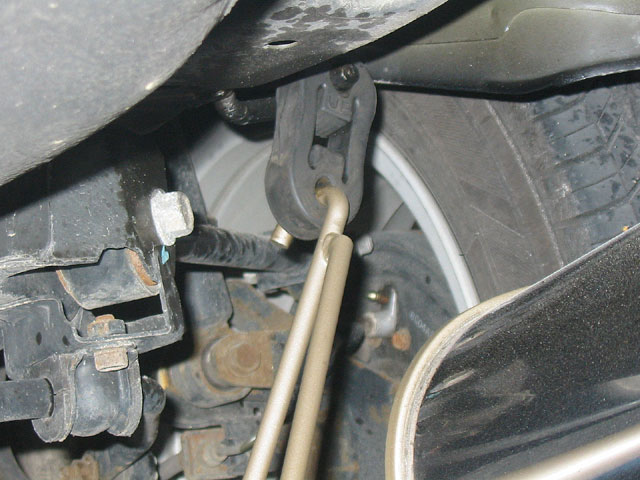
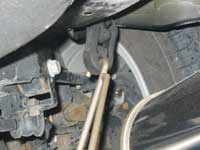
| Here you can see the second-most rear
hanger. Once you've got these two up you can slowly let go of the
muffler until it's hanging happily on it's own. It won't be level,
but that's fine for now. |
|
 |
|
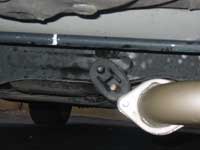
| Next, bring the connecting pipe and the
other two rubber hangers under the car with you. Put the rubber hangers
on the chassis pegs first, then hang the connecting pipe. Here you
can see the third rear-most hanger. Once you've gotten the connecting
pipe suspended, you can leave it hanging as well. Get two of the bolts
and one of the metal gaskets that came with the system. Put the metal
gasket between the muffler pipe and connecting pipe, then attach them
with the bolts. Put the nuts on the bolts but don't tighten them. |
|
 |
|
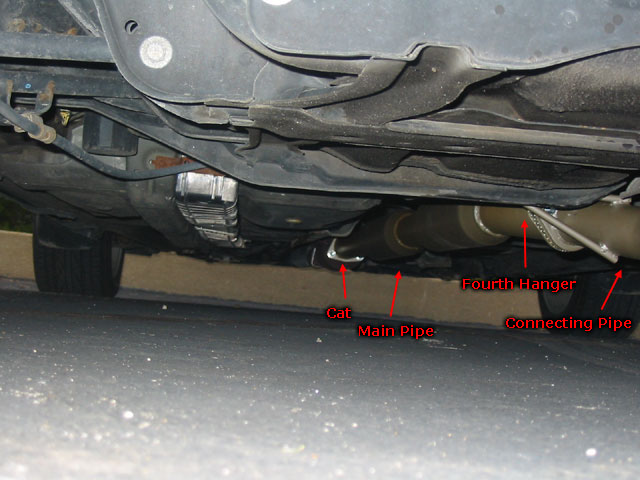
You can't see the fourth hanger here, but you can see
the support peg coming off the connecting pipe. Once these two parts
are connected you can get the main pipe ready. It really helps to
have a second person holding the main pipe level for you. Bring the
main pipe up to the cat and attach it to the cat with the three bolts.
Put on the nuts but don't tighten.
Now, get the last two bolts and gasket. Put the gasket between the
main pipe and connecting pipe, then attach the bolts. Once all the
parts are suspended you can hand tighten all the nuts making sure
that things stay aligned. Also make sure that none of the rubber hangers
has slipped off. When satisfied you can tighten all the bolts. |
|
 |
|
Reconnect your battery and start your
engine and you'll immediately notice that your car has a different
sound even at idle.
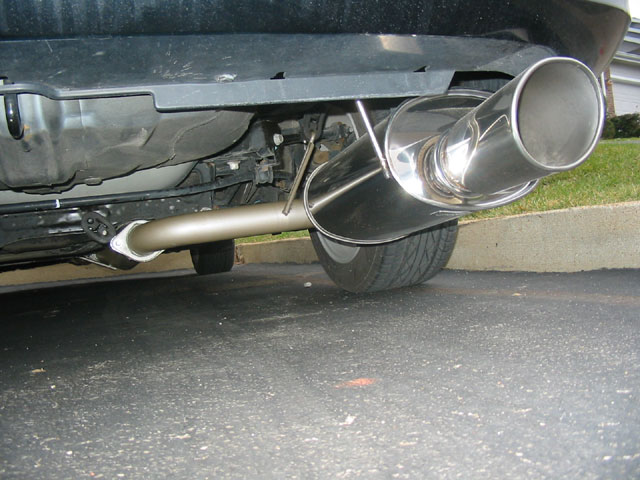
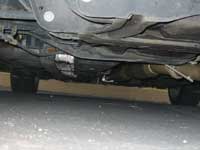
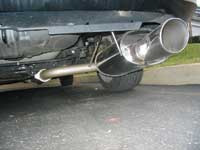
Here's a picture of the completed system from underneath. |
|
 |
|
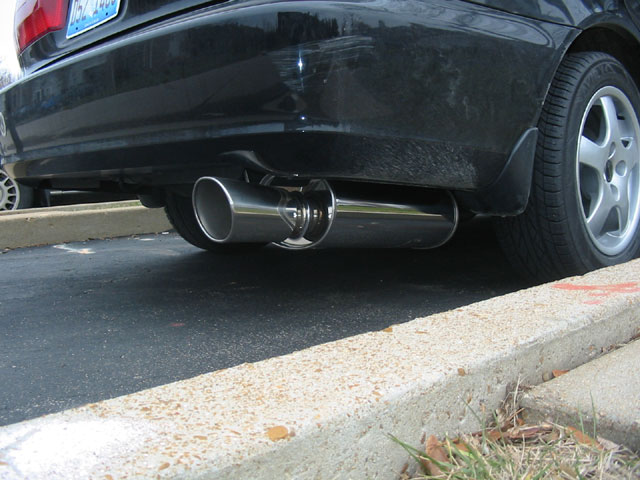
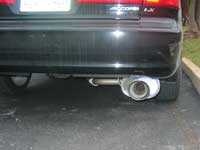
Here's a picture from the back.
I'm pleased with the sound and I don't think it turns as many heads
as I originally expected, which is a good thing. It gets a bit loud
on a 5 hour drive from St. Louis to Chicago but it's pretty tolerable.
When accellerating under a bridge, you can sometimes hit a resonance
frequency where you'll feel pulses of sound hitting you which is pretty
cool. |
|
 |
|
One last picture from the side.
The more I drive the more I think that I have lost a little torque
under 3000 rpms. 3000-4000 rpms is comparable to the CAI alone but
more than stock. Above 4000 rpms the car definitely feels faster and
I've noticed myself losing traction when accelerating more often than
I used to.
I'm pretty pleased with the exhaust and have even been complimented
by strangers a few times. Alas, now that my car is lowered, it does
scrape every once in a while. |
|
 |
|
| Introduction
| Installation |
|
|
| |
|
|