| |
|
click for a larger image |
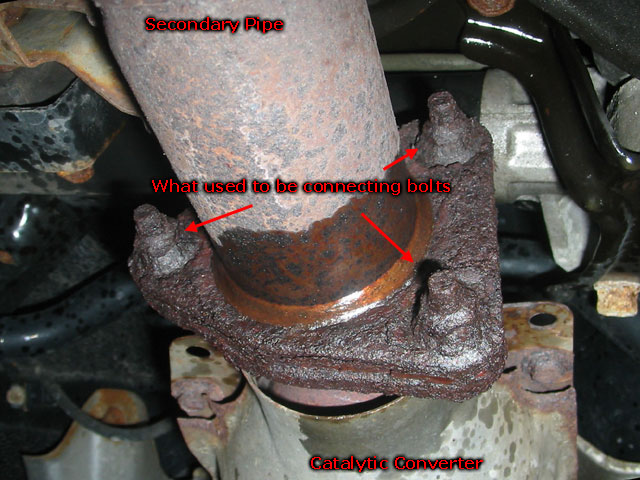
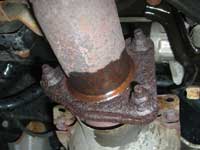
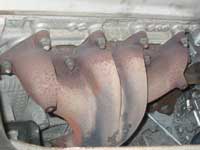
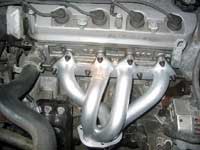
Here is an excellent shot of what snow and salt does
to your car. The bolts connecting the secondary and the catalytic
converter are so rusted that they are just one solid blob of rust!
In fact you can barely tell where the nuts end and the bolts begin.
These are not going to come off with a wrench and will have to be
forcefully removed. I used a Dremel tool to cut them off, but that
took me TWO DAYS for just three bolts.
If your bolts are rusty, I recommend going to a shop like CarX and
having them remove them, which is what I did to get the three bolts
off the other end of the cat for my exhaust. CarX removed the old
bolts and replaced them for $30. Obviously, you should do this BEFORE
you begin your installation. |
|
 |
|
When you're ready to start, raise up the front of your
car with ramps or a jack and jackstands. Unhook the negative (black)
terminal of the battery to reset the ECU.
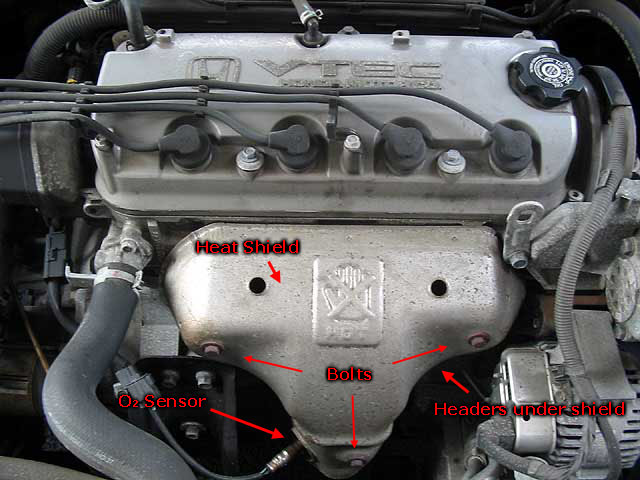
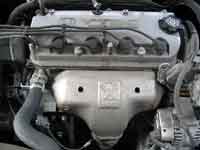
On front of your engine is the heat shield. Note that there is a big
symbol that says "HOT". Make sure that your engine has cooled
off so you don't burn yourself. After just a few minutes of running,
your engine and headers get extremely hot so give it at least an hour,
if not three hours, to cool down.
Spray some WD-40 or other penetrating lubricant on the heat shield
bolts. Leave them to soak. |
|
 |
|
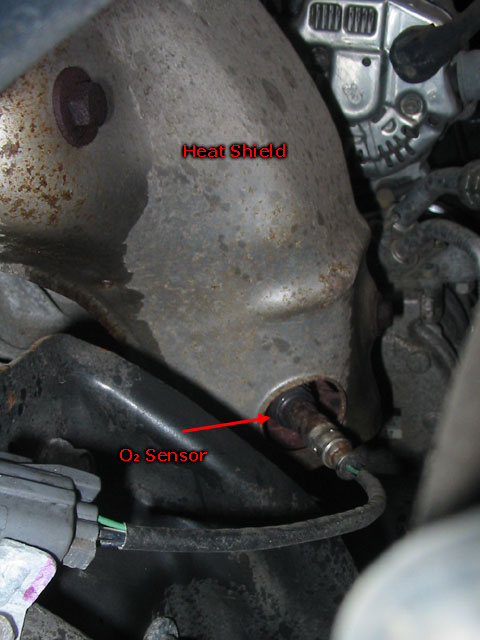
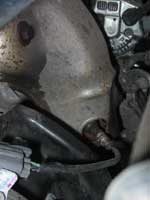
| On the bottom left side of the shield is a hole where
one of the O2 sensors is. The sensor has a wire running to a harness
(plug). You want to unplug the harness. |
|
 |
|
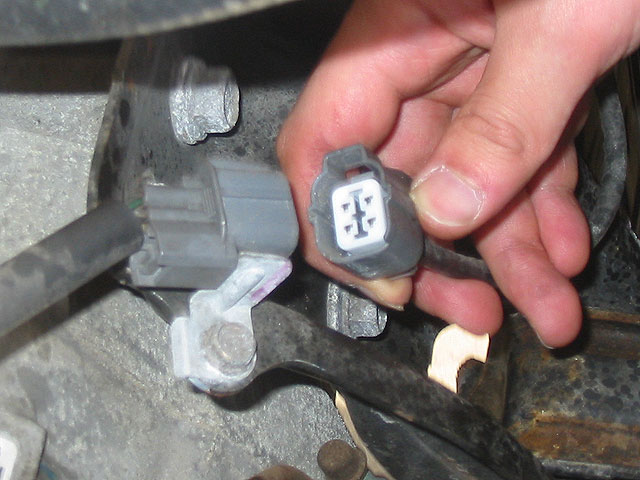
| The plug should have a tab. Press the tab and with
a little wiggling it should come apart. |
|
 |
|
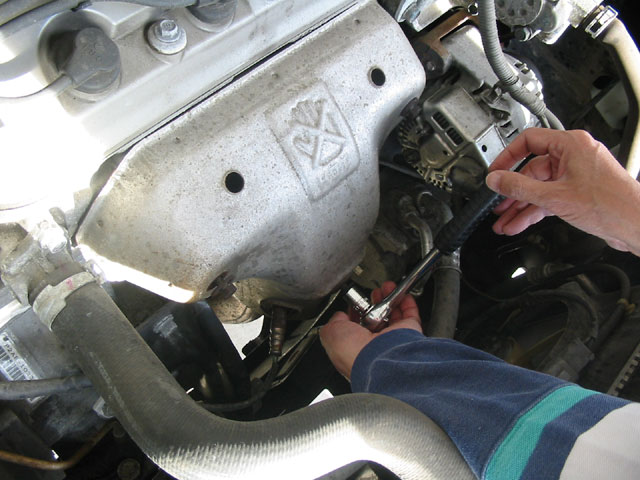
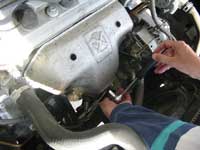
| Now remove the heat shield by removing 3 bolts. The
heat shield prevents someWD-40 from getting to the header, where the
threads are, so you may need to use a lot of WD-40 or you might just
wanna use some brute strength (and a breaker bar) since you'll be
throwing out the shield and bolts anyway. |
|
 |
|
The header is held on by 8 bolts. Douse these in plenty
of WD-40. Since the bolts are embedded in the engine block you want
to be extra careful not to damage them since they'll be VERY difficult
to replace. Since these have been hiding behind the shield, they shouldn't
be too bad and with a little patience and lot of WD-40 they shouldn't
be a big problem.
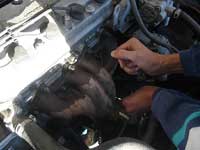
While theWD-40 soaks, you need to separate the main part of the header
from the secondary by removing the three bolts that attach them. You'll
need to get under the car with a breaker bar, which is a 18-36"
long socket wrench for getting tight bolts off. You'll also need an
extension to reach the bolts since this area of the engine bay is
pretty cramped. |
|
 |
|
| Once you get the header and the secondary separated,
you can begin to unfasten the header from the engine block. First,
loosen the large bolt and bracket on the lower right side of the header
that attaches it directly to the engine block. The bracket will have
one bolt attached to the header and another attached to the engine
block. Remove the engine block bolt. You'll need to use WD-40 and
let it soak. Once you get it moving, loosen it a little but leave
it in place. |
|
 |
|
|
Now that the header bolts are soak in WD-40, you can begin to loosen
them. One by one, loosen each nut just a little, which means once
you've gotten it to move, go to the next nut. Go in an alternating
pattern starting from the center and working your way out. For instance,
if the two rows of nuts were numbered like this:
1-2-3-4
5-6-7-8
Then you should loosen them in an order like: 2, 7, 3, 6, 4, 5,
8, 1. Once they've all been loosened a little, start loosening them
about a full turn in the same order, then you can take them all
off. Remove the engine block bolt as well.
|
|
|
|
| Carefully slide the header off, while supporting it's
weight so you don't bend the bolts. In between the engine block and
the header is a metal gasket. Mine stayed stuck to the engine block,
but it may also be stuck to the header. Be careful not to damage the
gasket as you'll need it for the new header (although ideally, you
may want to just replace it) |
|
 |
|
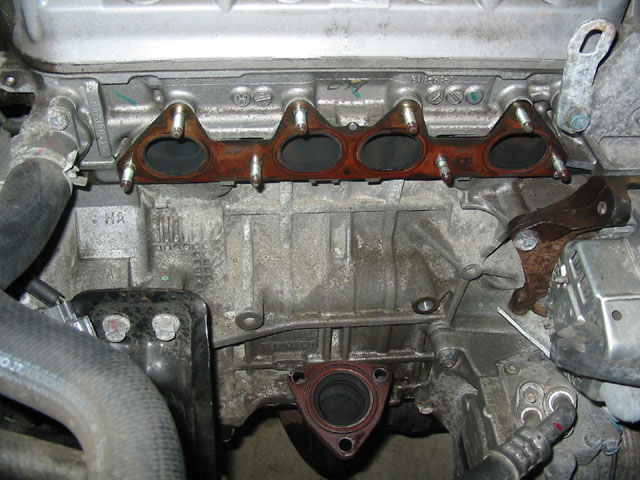
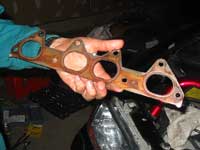
| Remove the gasket and wipe it off to remove any particles
that may be stuck to them. It should be clean when you re-attach it
so you have a good seal between the engine and the header. It looks
like two thin metal sheets fastened together with small rivets. |
|
 |
|
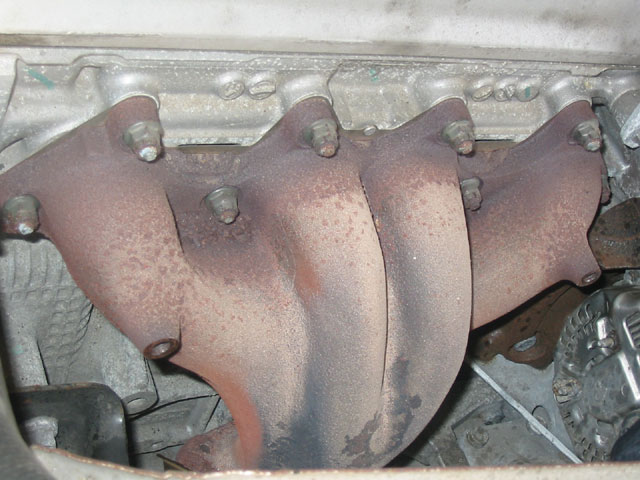
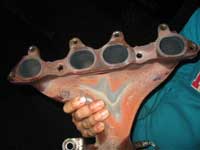
| Here is the stock header. You can now remove the O2
sensor with a wrench. It's probably pretty tight so use some WD-40,
but not too much. Add a little anti-sieze (a thicker lubricant that
won't evaporate) to the sensor threads and install it in the hole
on the new secondary pipe. |
|
 |
|
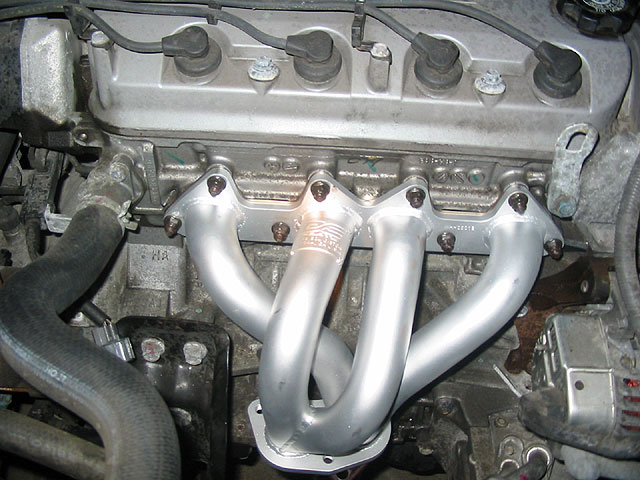
| Replace the gasket on the the engine block. Now, get
your new header and carefully put it into place, again being careful
not to damage the bolts. Re-attach the 8 nuts and in the same manner
that you removed them, slowly tighten them in an alternating pattern.
Tighten them to the appropriate torque, which should be specified
in your installation instructions or the Honda manual. |
|
 |
|
| Introduction | Installation | Installation
2 |
|
|
| |
|
|