| |
|
click for a larger image |
Please note that this installation is for the sedan.
The rear strut towers may be accessed differently in the coupe.
The first thing to do is take apart the back seat. Fold down the center
seat and you will have two end cushions on each side. These end cushions
are attached by a single black bolt. The bolt can be accessed by pushing
down on edge of the seat. This picture was taken on the left side
of the car. |
|
 |
|
| Using a socket wrench and an extension you should be
able to unscrew the bolt. You will need at least a 3" extension.
While pushing the seat cushion down, guide the wrench until you have
a grip on the bolt. |
|
 |
|
I found it much easier if you have a longer extension.
I recommend a 6" or 10" (pictured) extension. This allows
you to have more room to turn the wrench and you will not need to
hold down the cushion while you unscrew.
Note that this picture was taken on the right side of the car. |
|
 |
|
| Once you've removed the bolt, you can just place it
on the folded seat as seen in the picture. To remove the cushion slip
your hand under it and push upwards towards the seat belt. You may
need to pull out the seat belt a little so it is not in the way. It
should move up about 2-3" |
|
 |
|
| Wiggle the cushion up until you feel it release from
the car chassis. In this picture you can see one of the parts that
holds it to the car and the slot where it fits. |
|
 |
|
| Here you can see what it looks like with the cushion
completely removed. |
|
 |
|
| Next you need to remove the plastic guard that runs
along the top of the pass-through in order to access the rear strut
towers. Gently pull up the back of the trim near the left and right
edges. Feel for the outer points where the plastic is attached. You
should find tabs that you can push to release the outer clips. My
instruction book did not inform me of this so I just pulled and pulled
until the clips broke, so don't do that! There is one on each side.
If you can't get your fingers in, you may need to use a screw driver.
|
|
 |
|
| Once the clips on both sides are released, there are
just two pegs still holding the trim. Near the center, continue to
pull gently upward and they should come out. Then wiggle the trim
downwards to release it from the edge of the pass through hole. |
|
 |
|
| Here's a picture of where the outer tabs are supposed
to be under the trim. I ended up just snapping them off b/c I wasn't
sure how to release them... but now you know better. You should be
able to feel the tabs and push on them to release the trim. |
|
 |
|
| The top of your rear strut towers should now be visible.
They are held on by two nuts, one in the front and one in the back.
|
|
 |
|
| Loosen both nuts but remove only the back one. This
way when you raise your car, the strut tower will still be held up
by the last nut which you can unscrew by hand when you're ready. |
|
 |
|
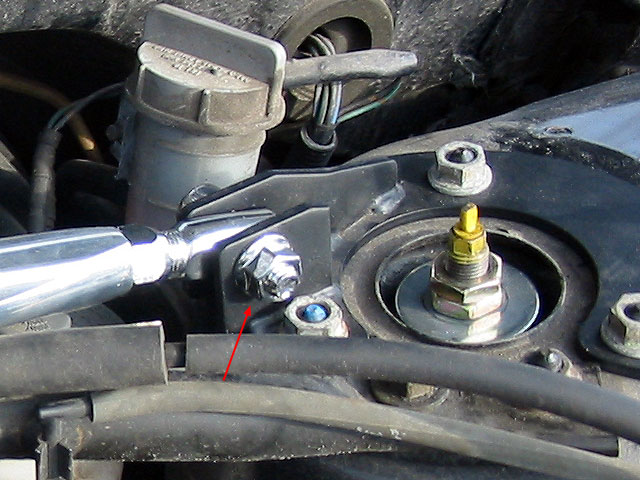
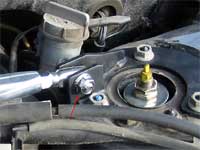
Now, on to the front.
If you have a strut bar, that has to be removed first. If your bar
and brackets are detachable, undo these. For me I had to undo the
bolt connecting the bar and bracket. This picture is for the left
side. |
|
 |
|
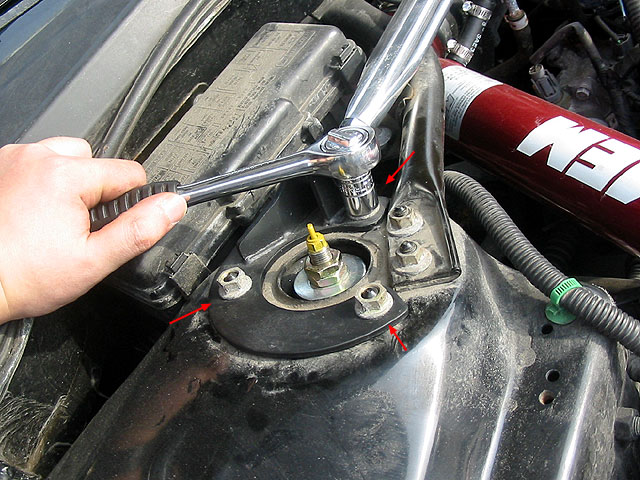
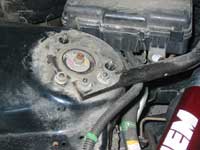
Once the bracket bolt is removed, you can remove the
three bolts that attach the strut tower and the bracket.
Yes, I'm aware that my engine bay is filthy... |
|
 |
|
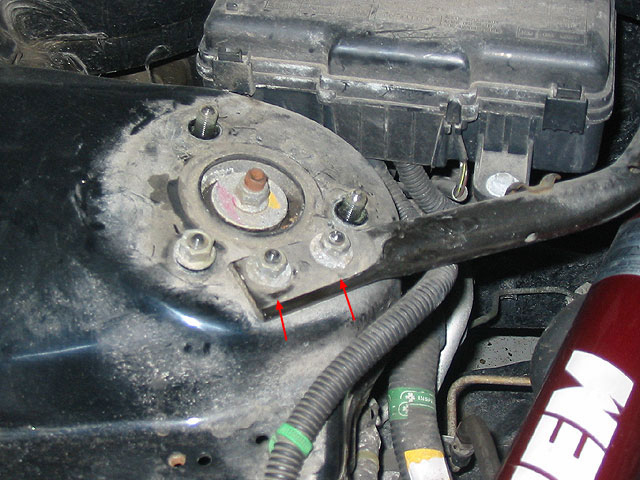
| After the first three nuts are removed, there are two
more that need to be removed that connect some support bars to the
strut tower. Loosen these two nuts but only remove one. Like the rear,
you should leave one loosened bolt attached so that the strut tower
remains attached until you are ready to remove it completely. |
|
 |
|
The water drain channels around your engine bay provide
a convenient place to keep your removed nuts and socket heads. You
may also wish to keep some extra trays around your car so you can
keep track of the bolts and where they belong.
|
|
 |
|
Next, loosen the bolts on your wheels just a little.
|
|
 |
|
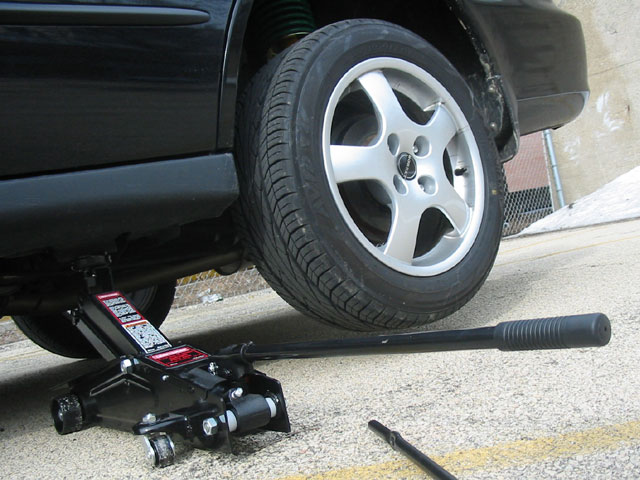
| If using jacks, raise up the front or rear of your
car (whichever you plan to work on first) and support it with jack
stands. Otherwise, if you're using a lift you may raise your car now. |
|
 |
|
| Remove the bolts and wheels from your car. You may
also wish to rotate your tires while you're at it. |
|
 |
|
| Introduction | Preparation
| Installation |
Final Settings |
|
|
| |
|
|
| |
|
|