| |
|
click for a larger image |
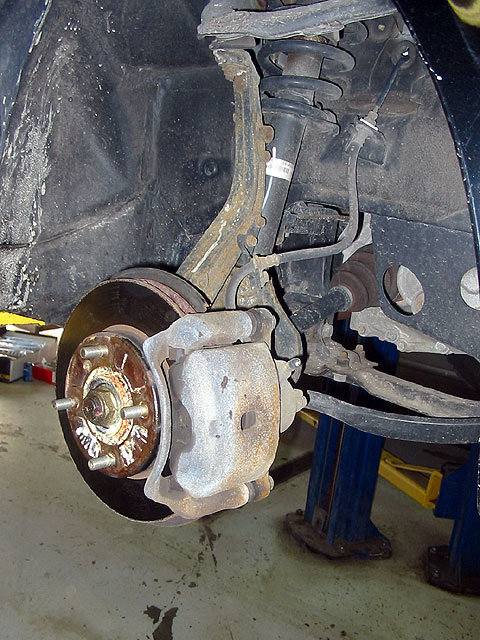
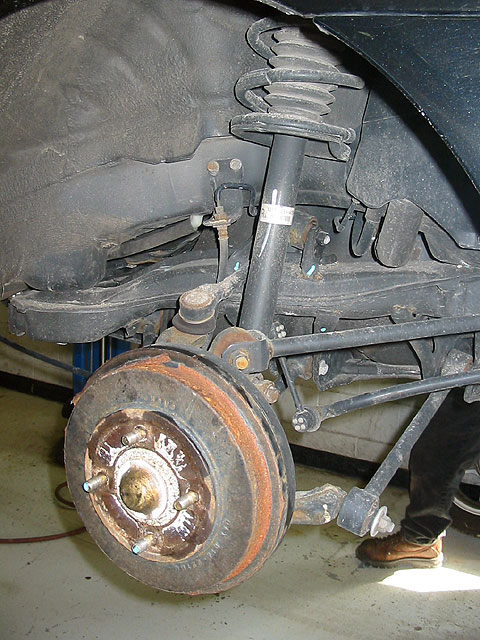
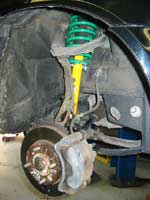
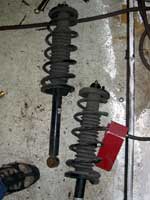
The front suspension will look like this.
Note that this picture is of the right side. |
|
 |
|
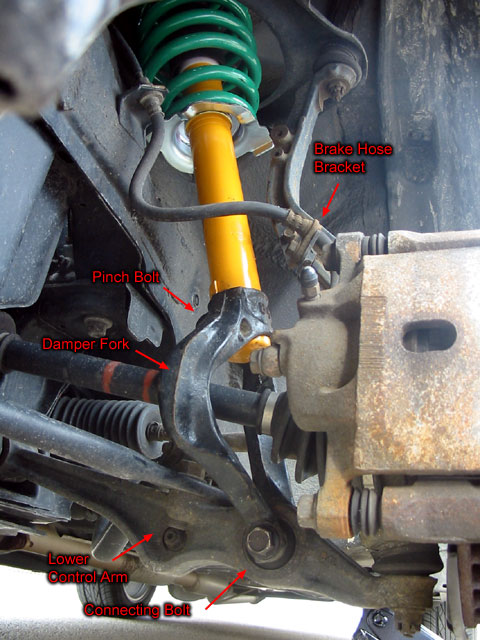
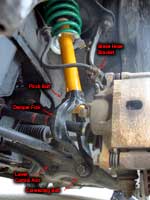
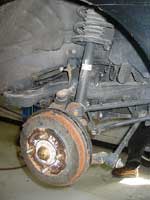
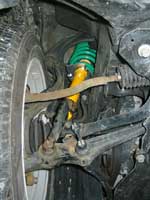
Here is a better view that will show you the important
parts. The following pictures are of the left side.
- The Brake Hose Bracket. You can detach this if you wish to give
you more room to maneuver the parts.
- The Damper Fork grips the front shock and connects it to the lower
control arm.
- The Pinch Bolt attaches the Damper Fork to the shock. This will
be the first bolt to remove.
- The Lower Control Arm Connecting Bolt connects the lower control
arm to the Damper Fork (go figure). This will be the second bolt to
remove. |
|
 |
|
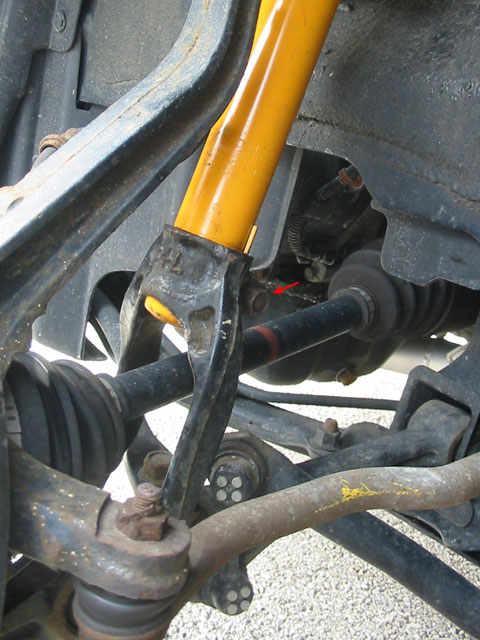
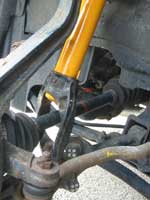
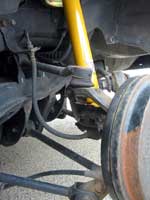
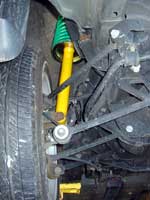
Here's a better view of the damper fork and the pinch
bolt. Spray the bolt with WD-40 or similar lubricant and remove it.
When you've loosened the damper bracket it will release from the shock
and drop down so you should support the suspension assembly while
you loosen this. A friend can do this, or you can support it with
an extra jack, or just hold it in one arm while you loosen the bolt. |
|
 |
|
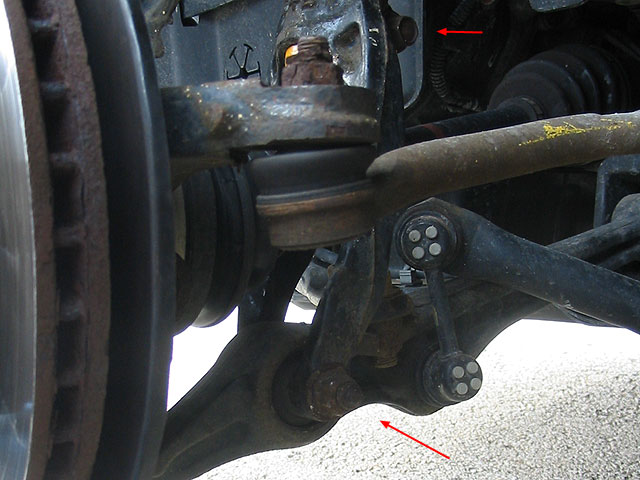
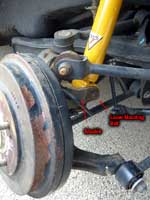
| Here's a better view of the connecting bolt (you can
also see the pinch bolt). Lubricate the nut on the connecting bolt
and remove it. Pull the bolt out. You may need a mallet or hammer
to tap the bolt out as it may be quite tight. |
|
 |
|
With both bolts removed, the damper fork should be
loose. Pull it out of the wheel well and place it to the side and
your suspension will look something like this.
Note that this picture is of the right side of the car.
With the damper fork removed, you can now remove the strut tower assembly.
Undo that last nut holding the assembly at the top of the tower and
it will drop down. With a little finesse you should be able to get
the strut assembly out. You may need to move the suspension up and
down to make room. If you did not remove the brake cable earlier and
it is in the way, then you may wish to remove it now. |
|
 |
|
It's your decision whether you want to remove all the
strut towers now, or do the front first and the rear later (based
on whether you've got a lift or only one pair of jack stands). We
will continue with the removal of the rear strut towers now and get
to the spring compression later.
The rear suspension is a little less complicated than the front since
it doesn't have to steer or drive the car. There is only one bolt
that needs to be removed making it much simpler and quicker. Here
is what it looks like stock. This is the left side. |
|
 |
|
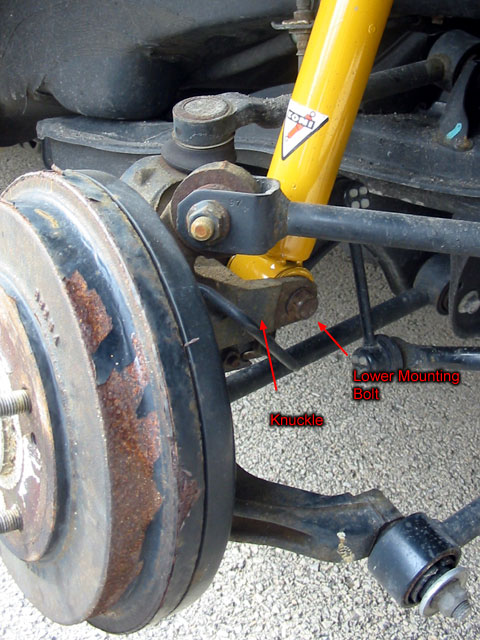
Here's another view of the back though it's tough to
see what matters from this angle. You can see the nut on the other
end of the lower mounting bolt. At least I think that's the other
end. When you do this, make sure you've gotten the right nut/bolt.
Spray the bolt with lubricant and remove the nut. |
|
 |
|
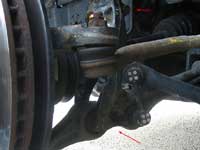
Here's another view of the back where you can see the
lower mounting bolt better. Once you've removed the nut, you'll also
need to remove the bolt which you may need to pound out with a mallet
or hammer. Make sure you support the weight of the suspension by supporting
the knuckle. Have a friend help or use an extra jack to support it,
otherwise you can hold it with your other hand while you remove the
bolt.
Now the strut assembly should be free of the suspension. Undo the
last bolt at the top of the strut tower to release it and pull out
the strut tower. You may need to raise or lower the knuckle to get
it free. |
|
 |
|
| Here's what the old stut towers look like as originally
assembled. These are the rear. |
|
 |
|
Now you're ready to take apart the strut assemblies
and reassemble them with the appropriate new parts. In order to do
this, the springs must be compressed, and unbolted from the struts.
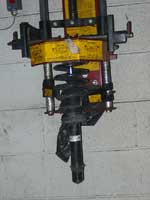
The Lexus service center we were at had a wall mounted spring compressor
which sped up the job. Here you can see it working on a front strut
assembly. The spring has already been compressed and the strut/shock
is ready to be unbolted and released from the spring. This is the
dangerous part as doing this incorrectly could result in the spring
uncompressing. Since it's designed to hold a thousand pounds worth
of your car, having it uncompress on bolts or body parts is a very
bad thing... |
|
 |
|
Since I did not dissassemble and re-assemble the strut
assemblies, I recommend you visit some other sites for details on
how to compress springs safely and properly.
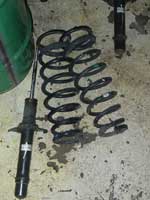
Here's what the front springs and shocks look like after they've all
been taken apart (without all the little parts). |
|
 |
|
There are lots and lots of little parts in a strut
assembly. So when you take them apart, keep all the parts in order
so you know where they belong as you will need to use some of the
stock parts in addition to the new parts that came with the shocks.
You'll need to look at the instructions that come with the struts
to figure out what to keep and what order they go on.
Here is the parts list for the front. |
|
 |
|
FYI, some of the stock parts did not fit the shocks
quite right so we needed a "reamer" tool to expand some
of the holes. Also, feel free to use plenty of lubricant to get the
parts on.
Here is the parts list for the rear. |
|
 |
|
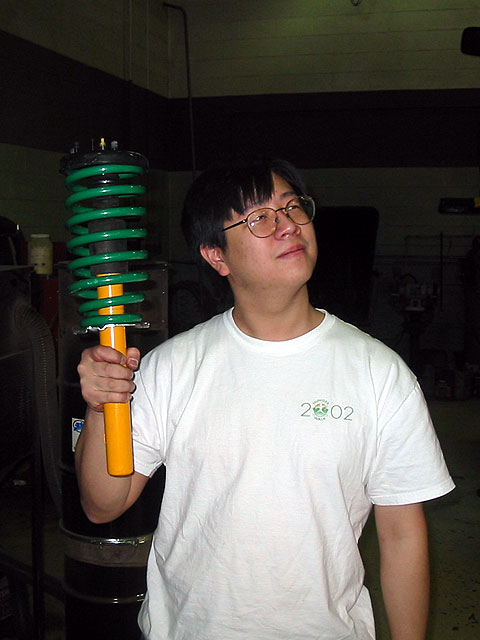
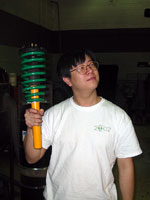
Here I am showcasing the newly assembled strut tower using some of
the older small parts along with a new shock, spring and various other
small parts.
The new rear springs were actually short enough that we didn't need
to use the spring compressor. One person pushed the springs down while
another screwed on the nut!
|
|
 |
|
Once all the strut towers have been re-assembled, it's
a fairly straight forward job to put them back where they belong and
re-attach everything. I'm just going to steal the Hayne's manual's
favorite step, "Installation is the reverse of removal."
Here you can see the front all assembled back together. |
|
 |
|
| Here's the rear all back together. |
|
 |
|
| Introduction | Preparation
| Installation | Final Settings |
|
|
| |
|
|
| |
|
|